How to use EC2 DMS
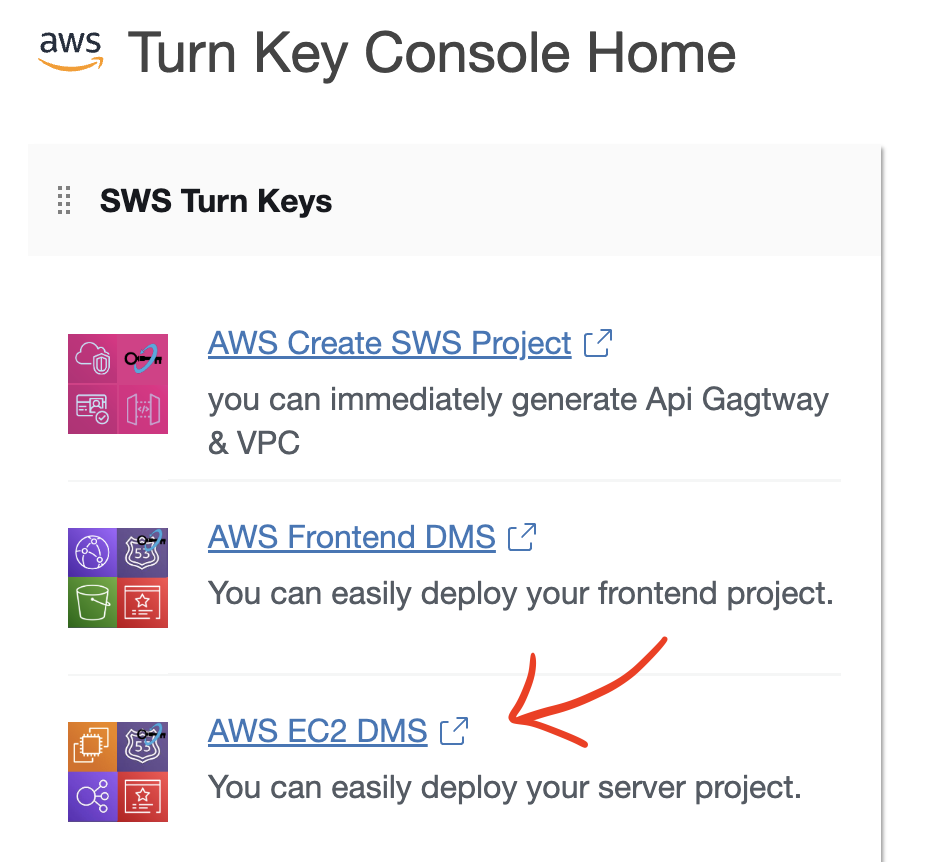
- After clicking the link below to access the SWS console web, proceed to log in to the AWS Turn Key Console.
- Once you have accessed the AWS Turn Key Console, click on
AWS EC2 DMS.

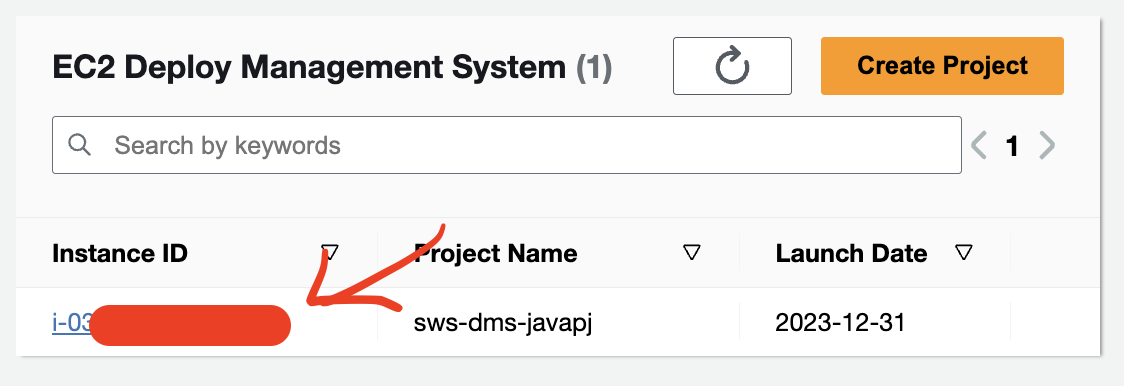
- Click on the
instance IDof theEC2 DMSproject.

- The
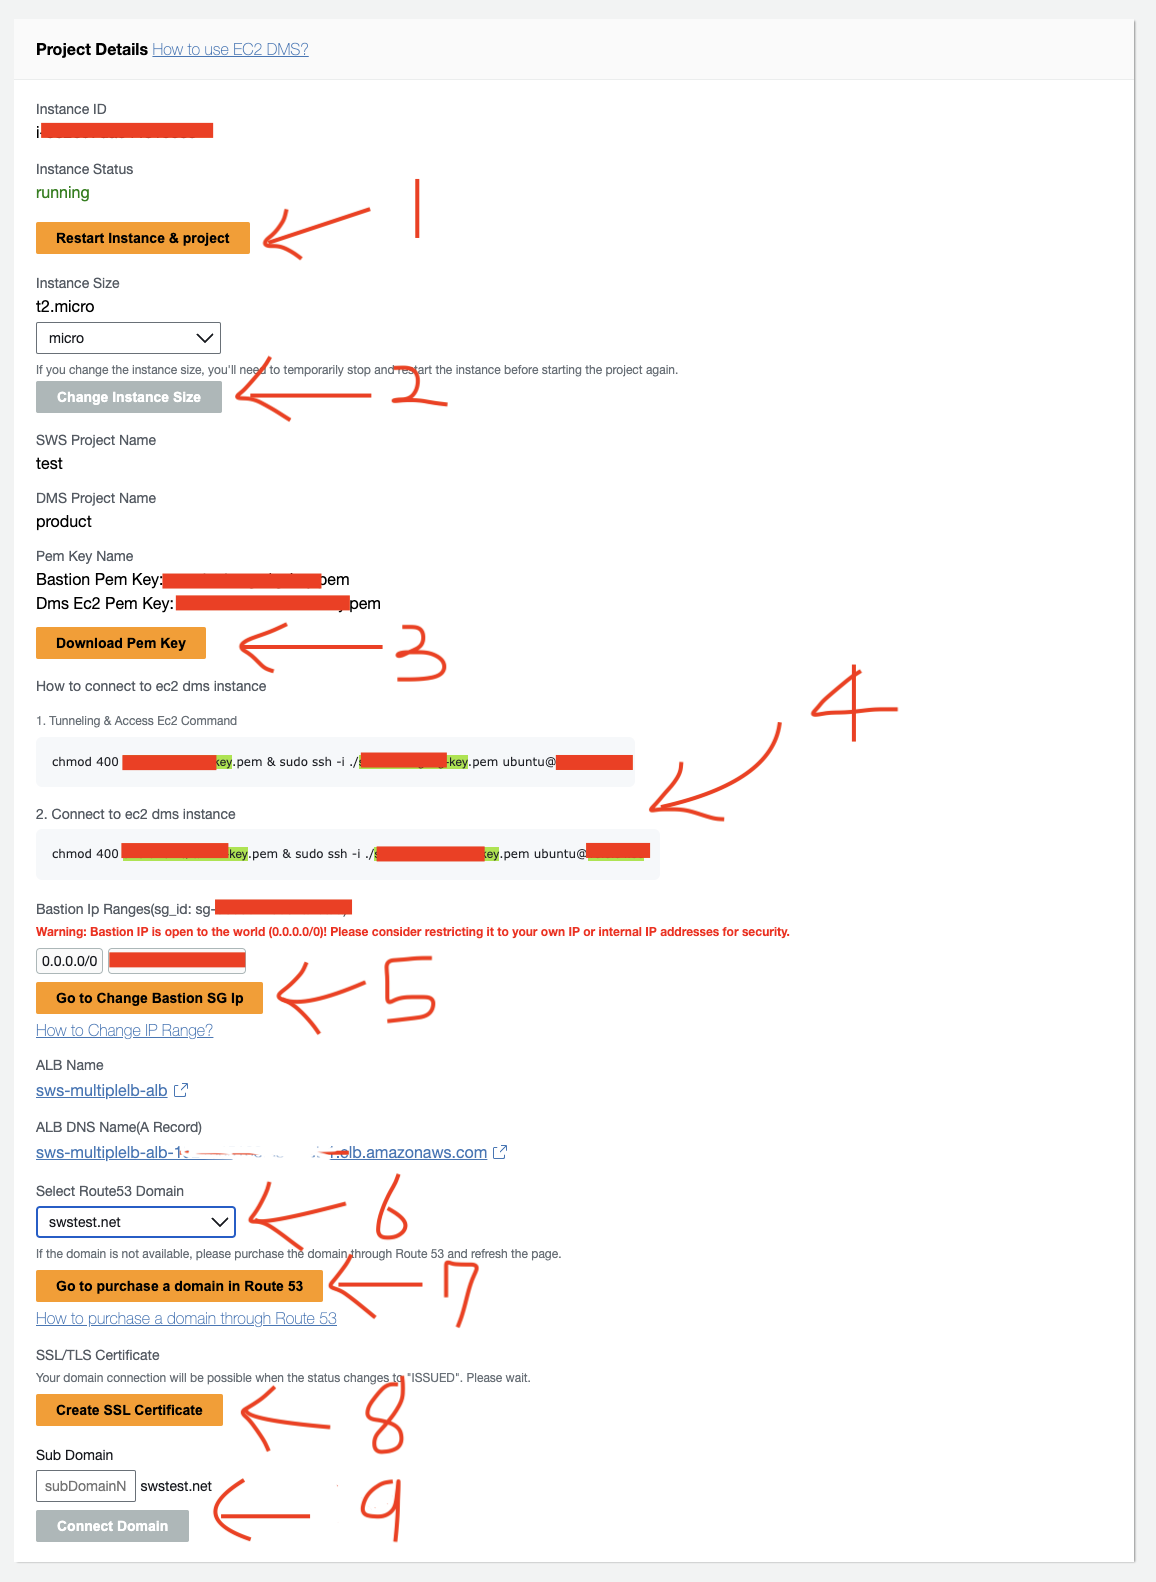
Project Detailsprovide functionality for downloading thePEM key, navigating to theALB DNSlink, and connectingSSLandsubdomainsfrom a domain purchased throughRoute53to theALB.

(1) Pressing the Restart Instance & Project button will stop the instance, restart it, and then relaunch the project.
(2) When you select the instance size and click on the Change Instance Size button, the instance size will be changed. Please note that the instance will be stopped and restarted during this process, so be cautious as there will be downtime for your instance and project.
(3) Clicking the Download Pem Key button will download the PEM key for the Bastion EC2 and the private instance where the project is deployed to the local machine.
(4) In the How to connect to EC2 DMS instance section, commands are provided for accessing the DMS instance via a bastion EC2 and directly accessing a private EC2 instance.
(5) Clicking on the Change Bastion SG IP button will navigate you to the page in the AWS Console where you can change the IP for the Bastion Security Group.
(6) Select the list of domains purchased through Route53.
(7) Click the Go to purchase a domain in Route 53 button to navigate to the Route 53 dashboard. If you are unsure how to make a purchase, refer to the documentation on How to buy a domain with Route 53.
(8) Click the Create SSL Certificate button to link the SSL certificate of the selected domain with ALB. When the Status is ISSUED, Sub domain connections are possible.
(9) For example, if you want to create the domain docs.abc.com, enter docs in the subdomain name input and click the Connect Domain button. This will link the ALB with the selected domain.
- The
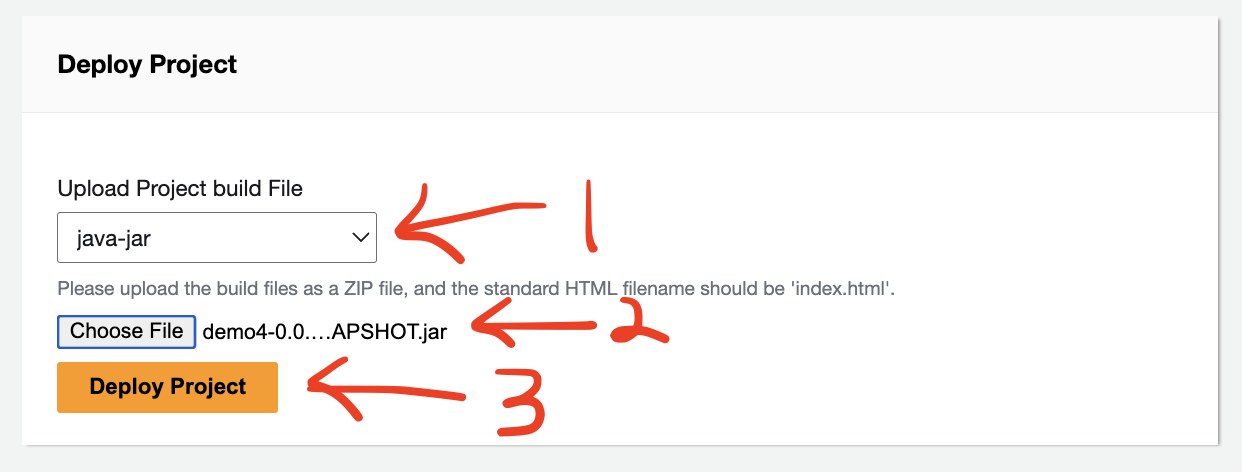
Deploy Projectsection provides functionality to re-upload and execute build files onEC2for deployment.

After selecting the type of the Upload Project build File and choosing the file using the Choose File option, proceed to deploy by clicking the Deploy Project button. The deployment process takes approximately 10 minutes.