How to route multiple EC2 instances and projects to a single ALB
If you want to route multiple EC2 instances to a single ALB, you can easily set it up using AWS EC2 DMS.
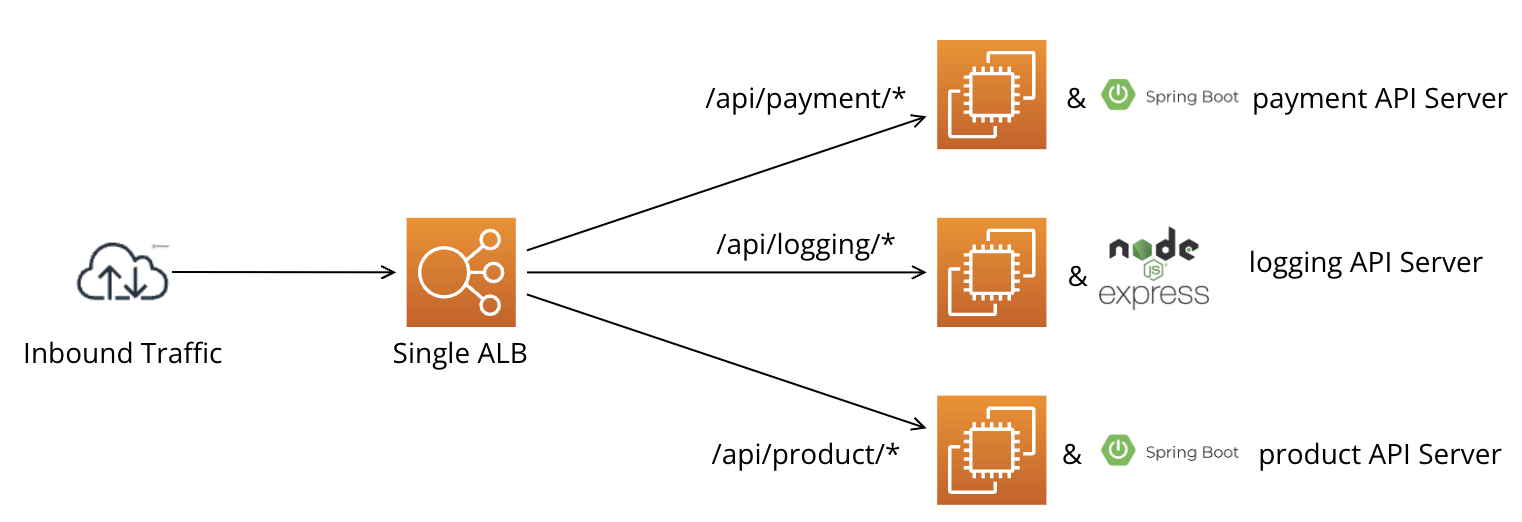
The image depicts an example of routing multiple servers, including a Spring Boot payment API server, an Express.js logging API server, and another Spring Boot API server, through a single ALB. Let's configure this directly through SWS.
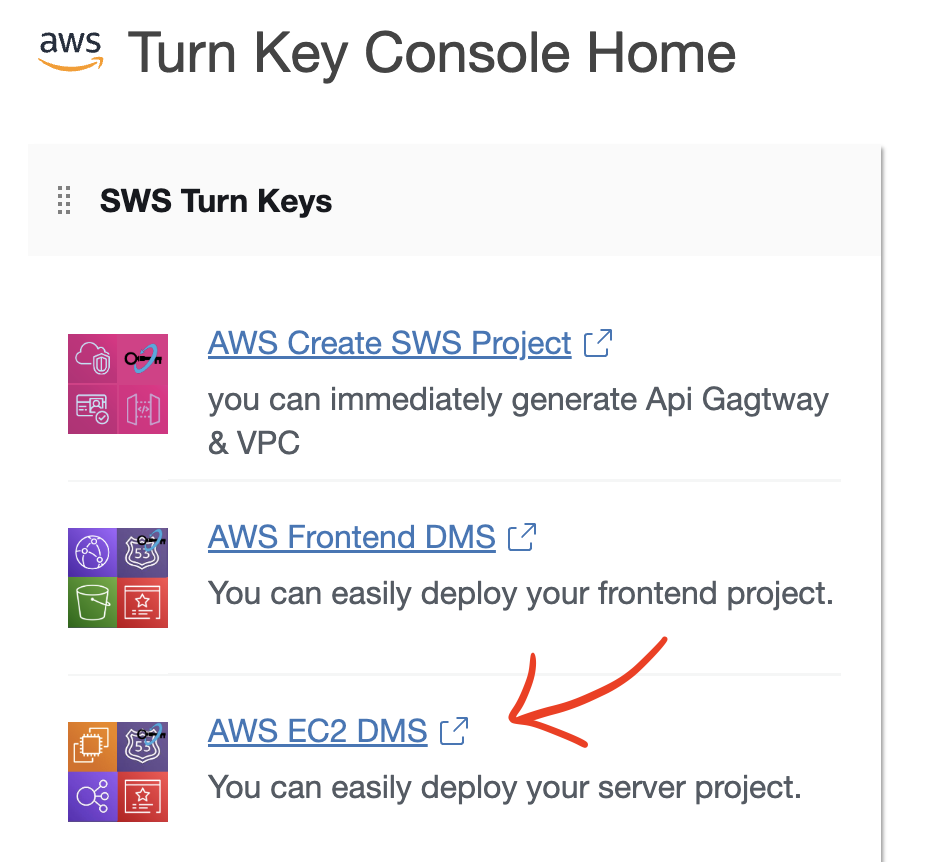
- After clicking the link below to access the SWS console web, proceed to log in to the AWS Turn Key Console.
- Once you have accessed the AWS Turn Key Console, click on
AWS EC2 DMS.
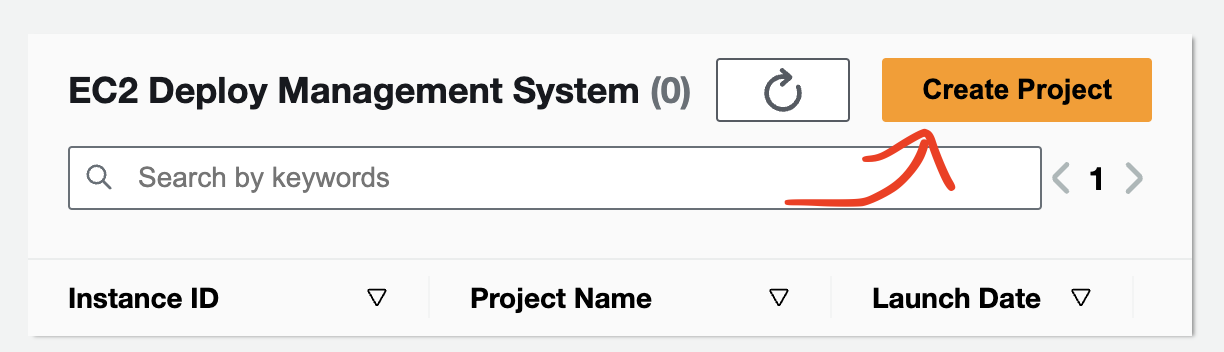
- click the
Create Projectbutton.
Step 1. Deploying the Spring Boot server on EC2 Instance, simultaneously create a new ALB (example, payment Spring Boot server).
- I'll set the prefix for your application. In the example provided, the prefix is defined as
/api/payment/*. Following that, a controller is configured to handle requests at the/api/payment/healthpath, allowing for server health checks.
package com.example.demo;

import org.springframework.stereotype.Controller;
import org.springframework.web.bind.annotation.GetMapping;
import org.springframework.web.bind.annotation.RequestMapping;
import org.springframework.web.bind.annotation.ResponseBody;

@Controller
@RequestMapping("/api/payment")
public class TestController {

    @GetMapping(value = "/health")
    @ResponseBody
    public String healthCheckPage () {
        return "OK";
    }

    @GetMapping(value = "/do")
    @ResponseBody
    public String order () {
        return "Payment SUCCESS";
    }

    @GetMapping(value = "/payment/cancel")
    @ResponseBody
    public String cancelPayment () {
        return "Payment Canceled";
    }
}
- Please proceed with the steps in the order indicated in the image below.
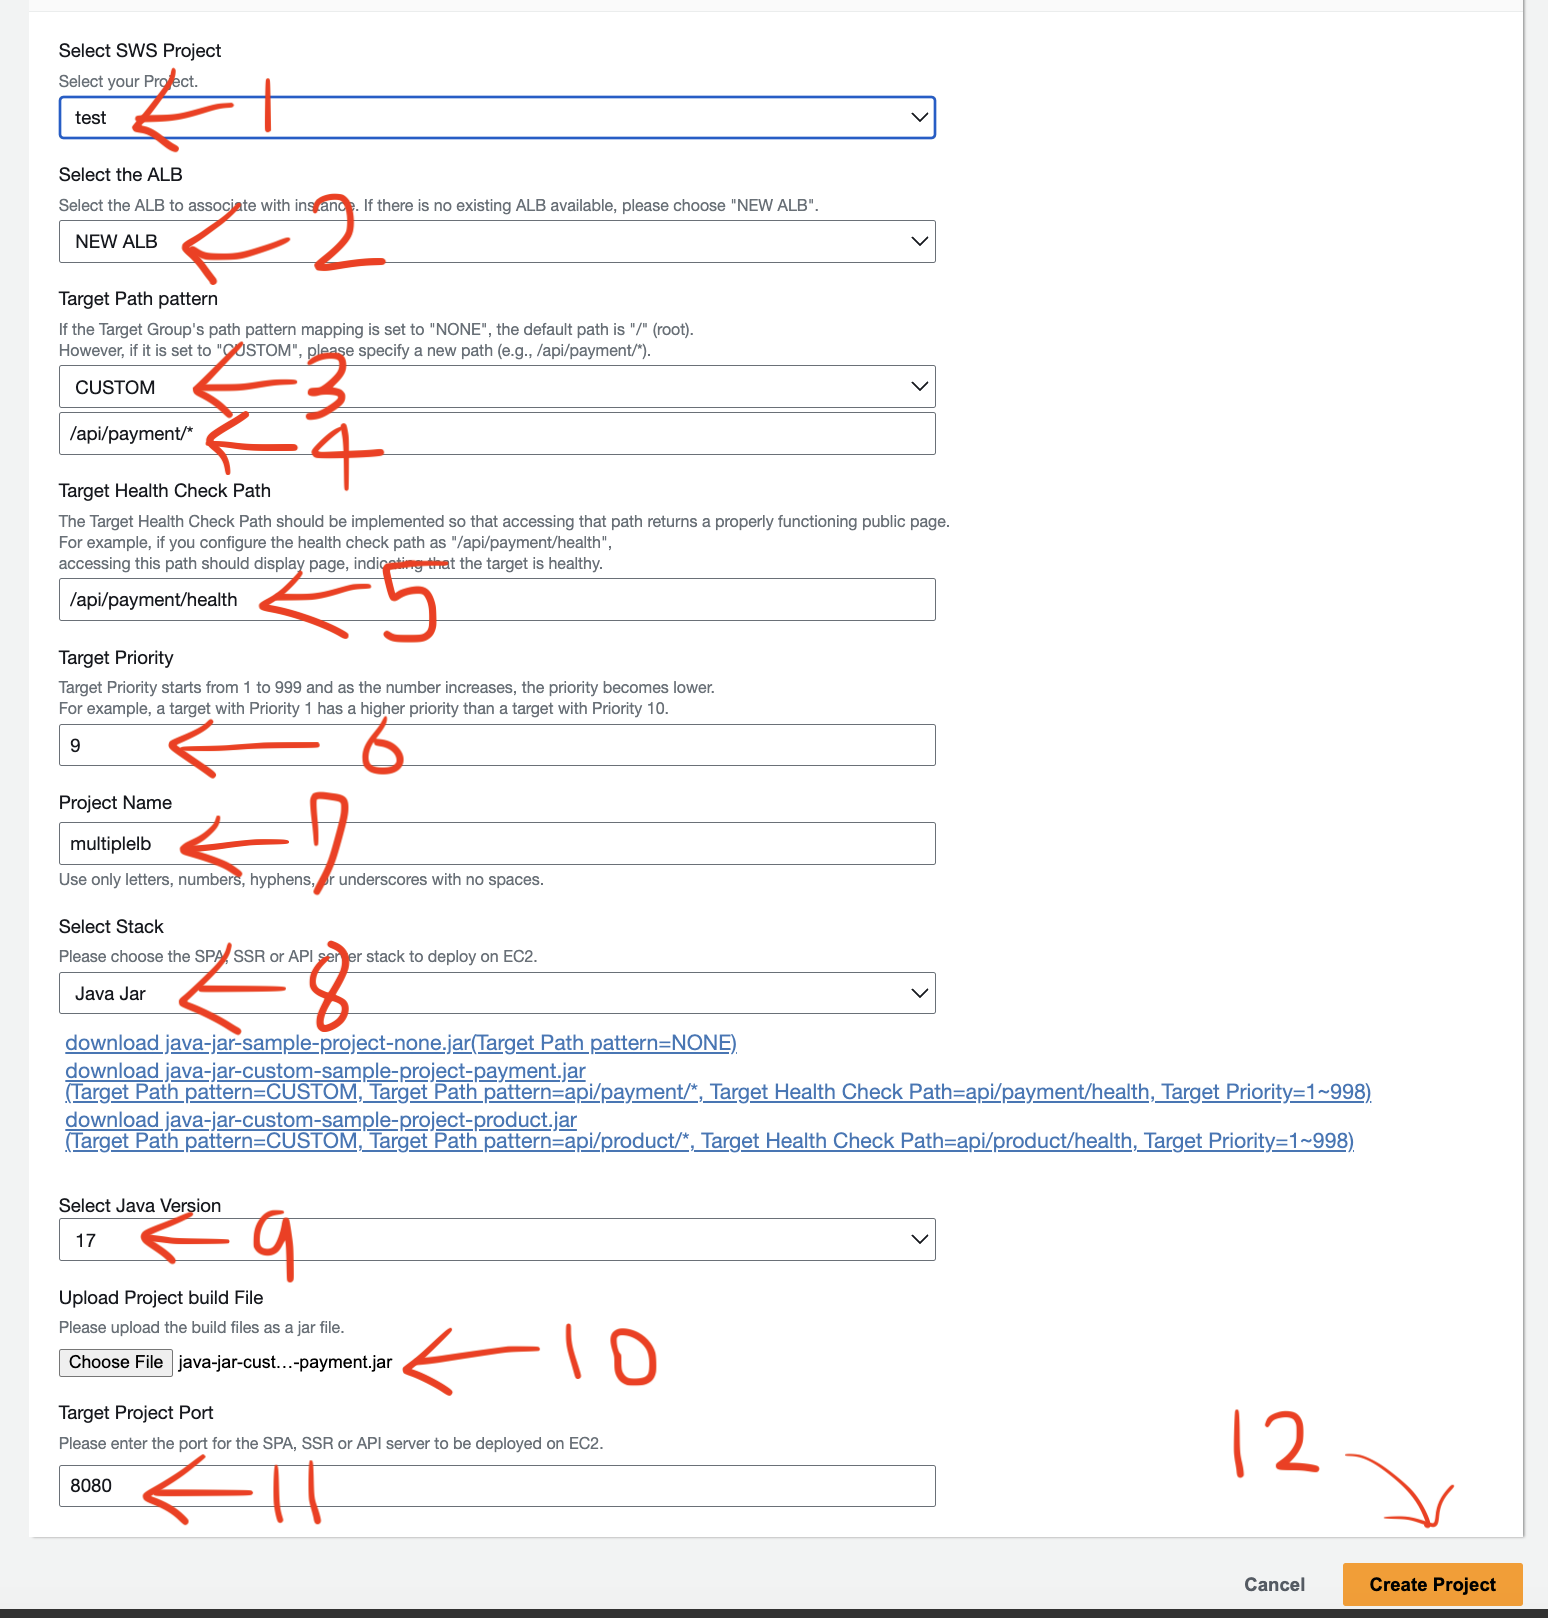
(1) Select the SWS Project.
(2) The Select the ALB option allows you to choose whether to deploy the project to EC2 instances by creating a new Application Load Balancer (ALB) and connecting it or by connecting to an existing ALB. If you want to deploy to a new ALB, select NEW ALB.
(3) Select CUSTOM for the Target Path pattern.
(4) Enter the prefix /api/payment/* as indicated in the code example above.
(5) Enter the health check path /api/payment/health as specified in the code example above.
(6) Set the target priority to a value between 1 and 999.
(7) Enter the Project Name.
(8) Select the stack for the project to be deployed. (Currently, Java Jar builds or nodejs project are supported.)
(9) When selecting a version based on the stack, simply choose the version that corresponds to your stack.
(10) Upload the java -> project's build file(jar file), nodejs -> project folder zip file . Please carefully read the instructions above Choose File before uploading the file.
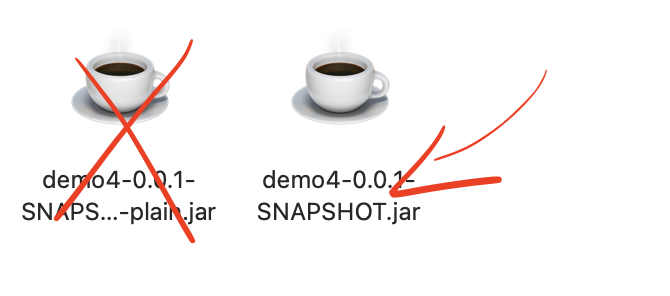
How to upload a Java JAR file
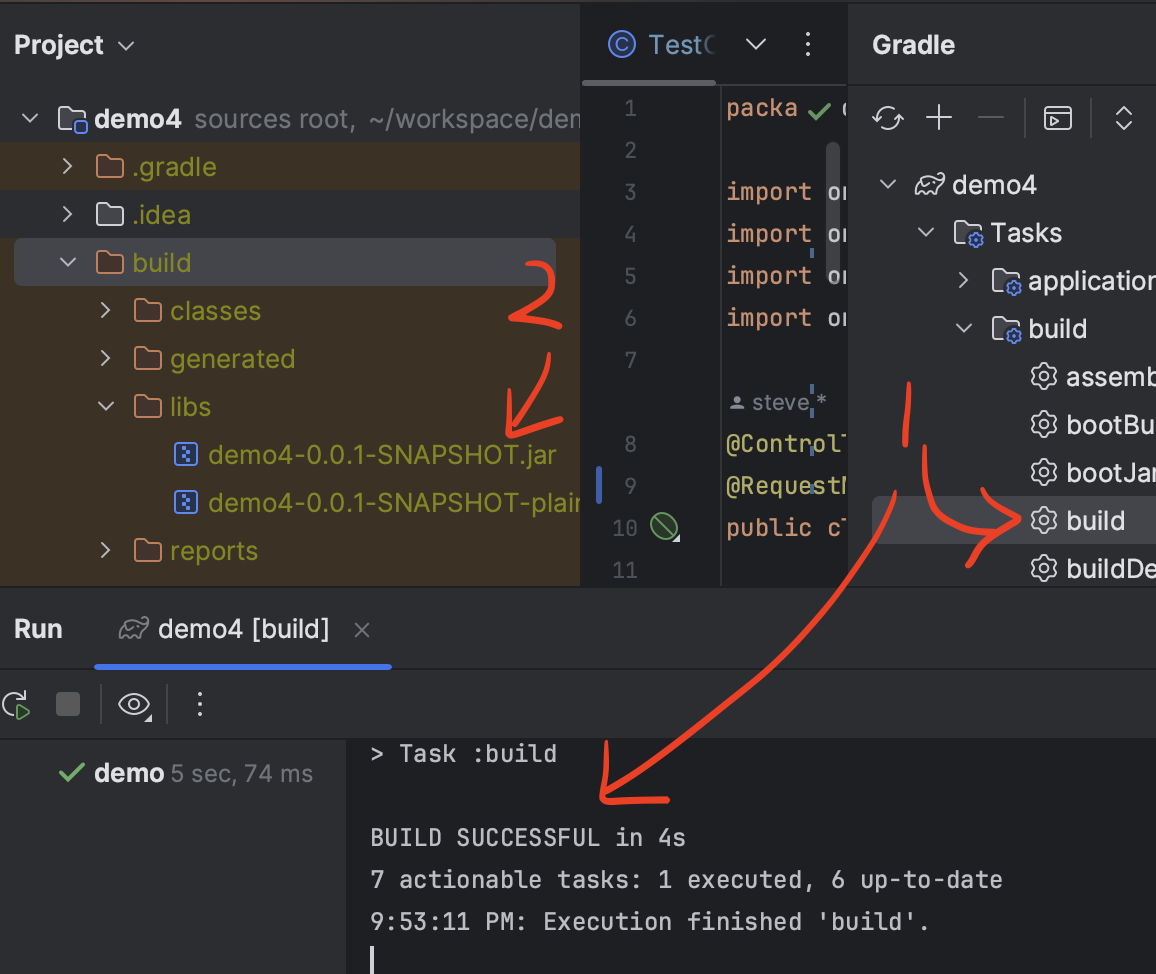
First, perform a Gradle or Maven build.
You just need to upload the JAR file without plain in the filename.
How to upload a Nodejs Stack(Expressjs, Reactjs, Nextjs ...) folder zip file
- First, navigate to the project root folder containing the package.json file.
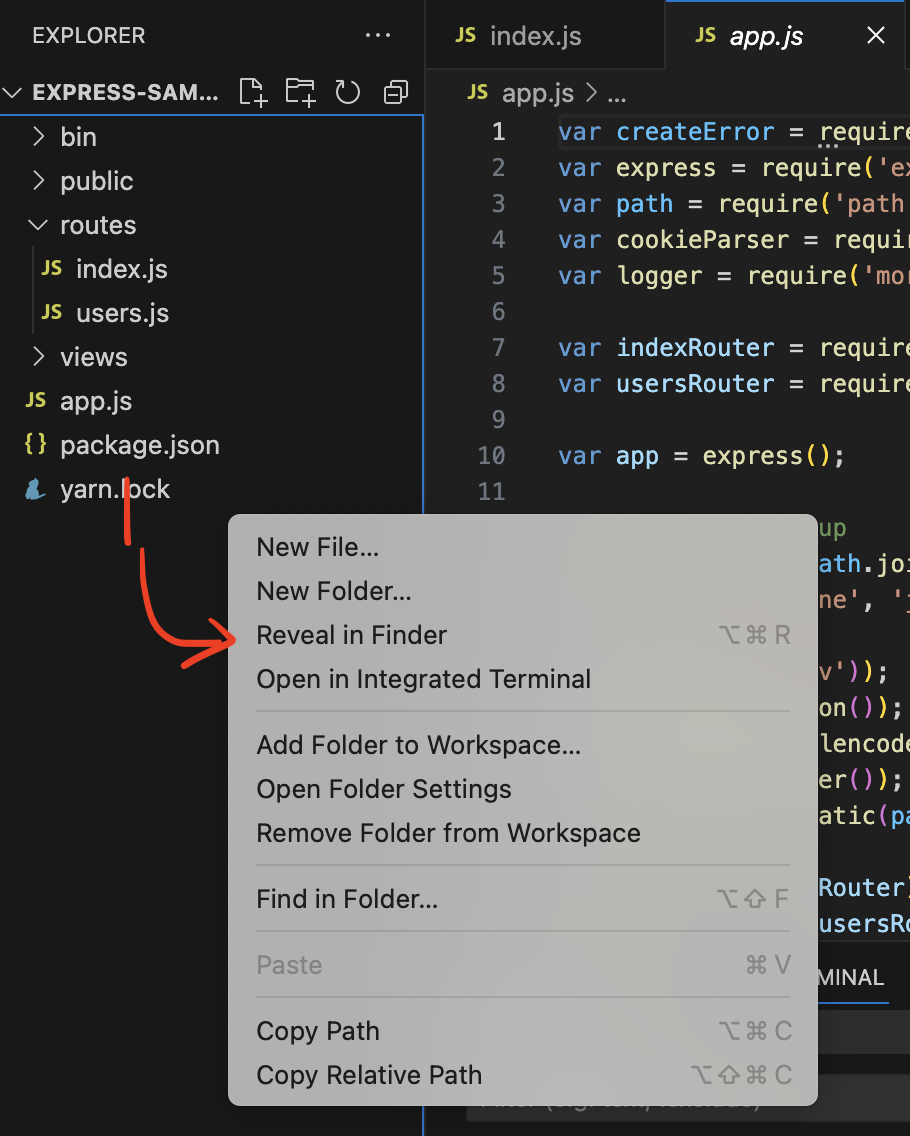
Drag all filesfrom the project root folder excluding the node_modules directory, thencompressthem into azip file
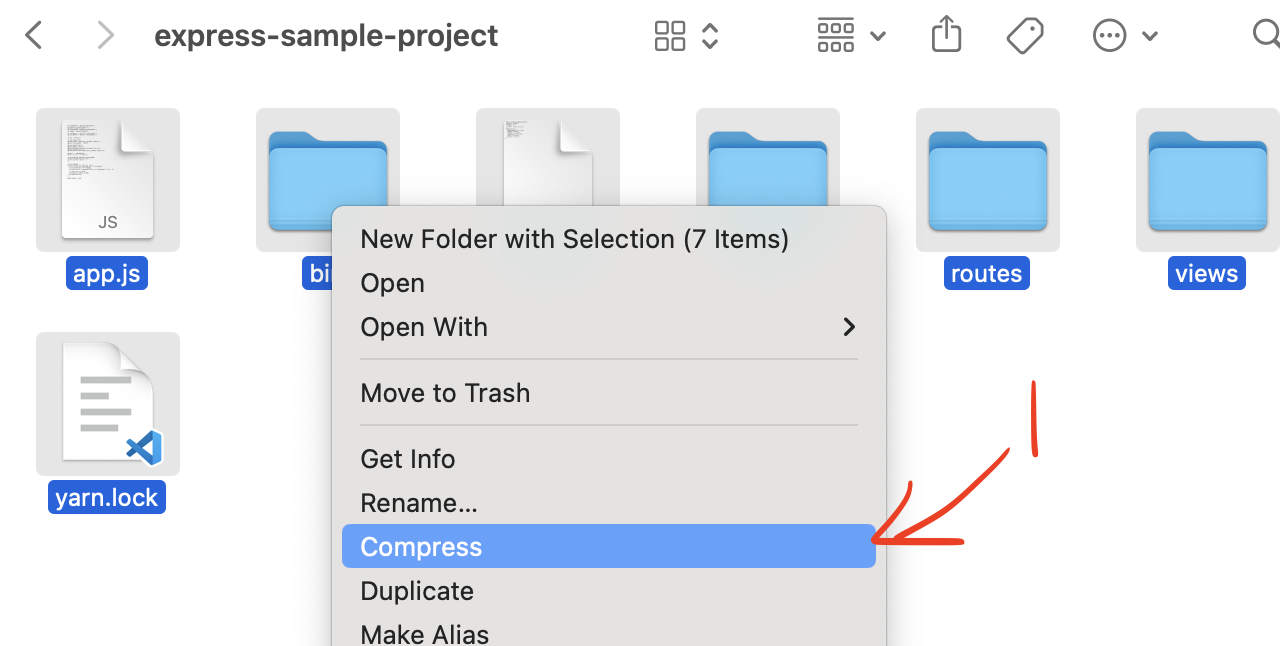
- Please upload the compressed zip file.
(11) Enter the port of the project to be deployed in the Target Project Port. The default port will be filled in if you selected the project stack above.
(12) Click the Create Project button.
Step 2. Deploying the Express.js server while connecting it to an existing ALB (example logging Express.js server).
- I'll set the prefix for your application. In the example provided, the prefix is defined as
/api/logging/*. Following that, a controller is configured to handle requests at the/api/logging/healthpath, allowing for server health checks.
var express = require('express');
var router = express.Router();

/* GET home page. */
router.get('/api/logging/health', function(req, res, next) {
  res.render('index', { title: 'Express' });
});
router.get('/api/logging/insert', function(req, res, next) {
  res.render('', { title: 'SUCCESS' });
});

module.exports = router;
- Please proceed with the steps in the order indicated in the image below.
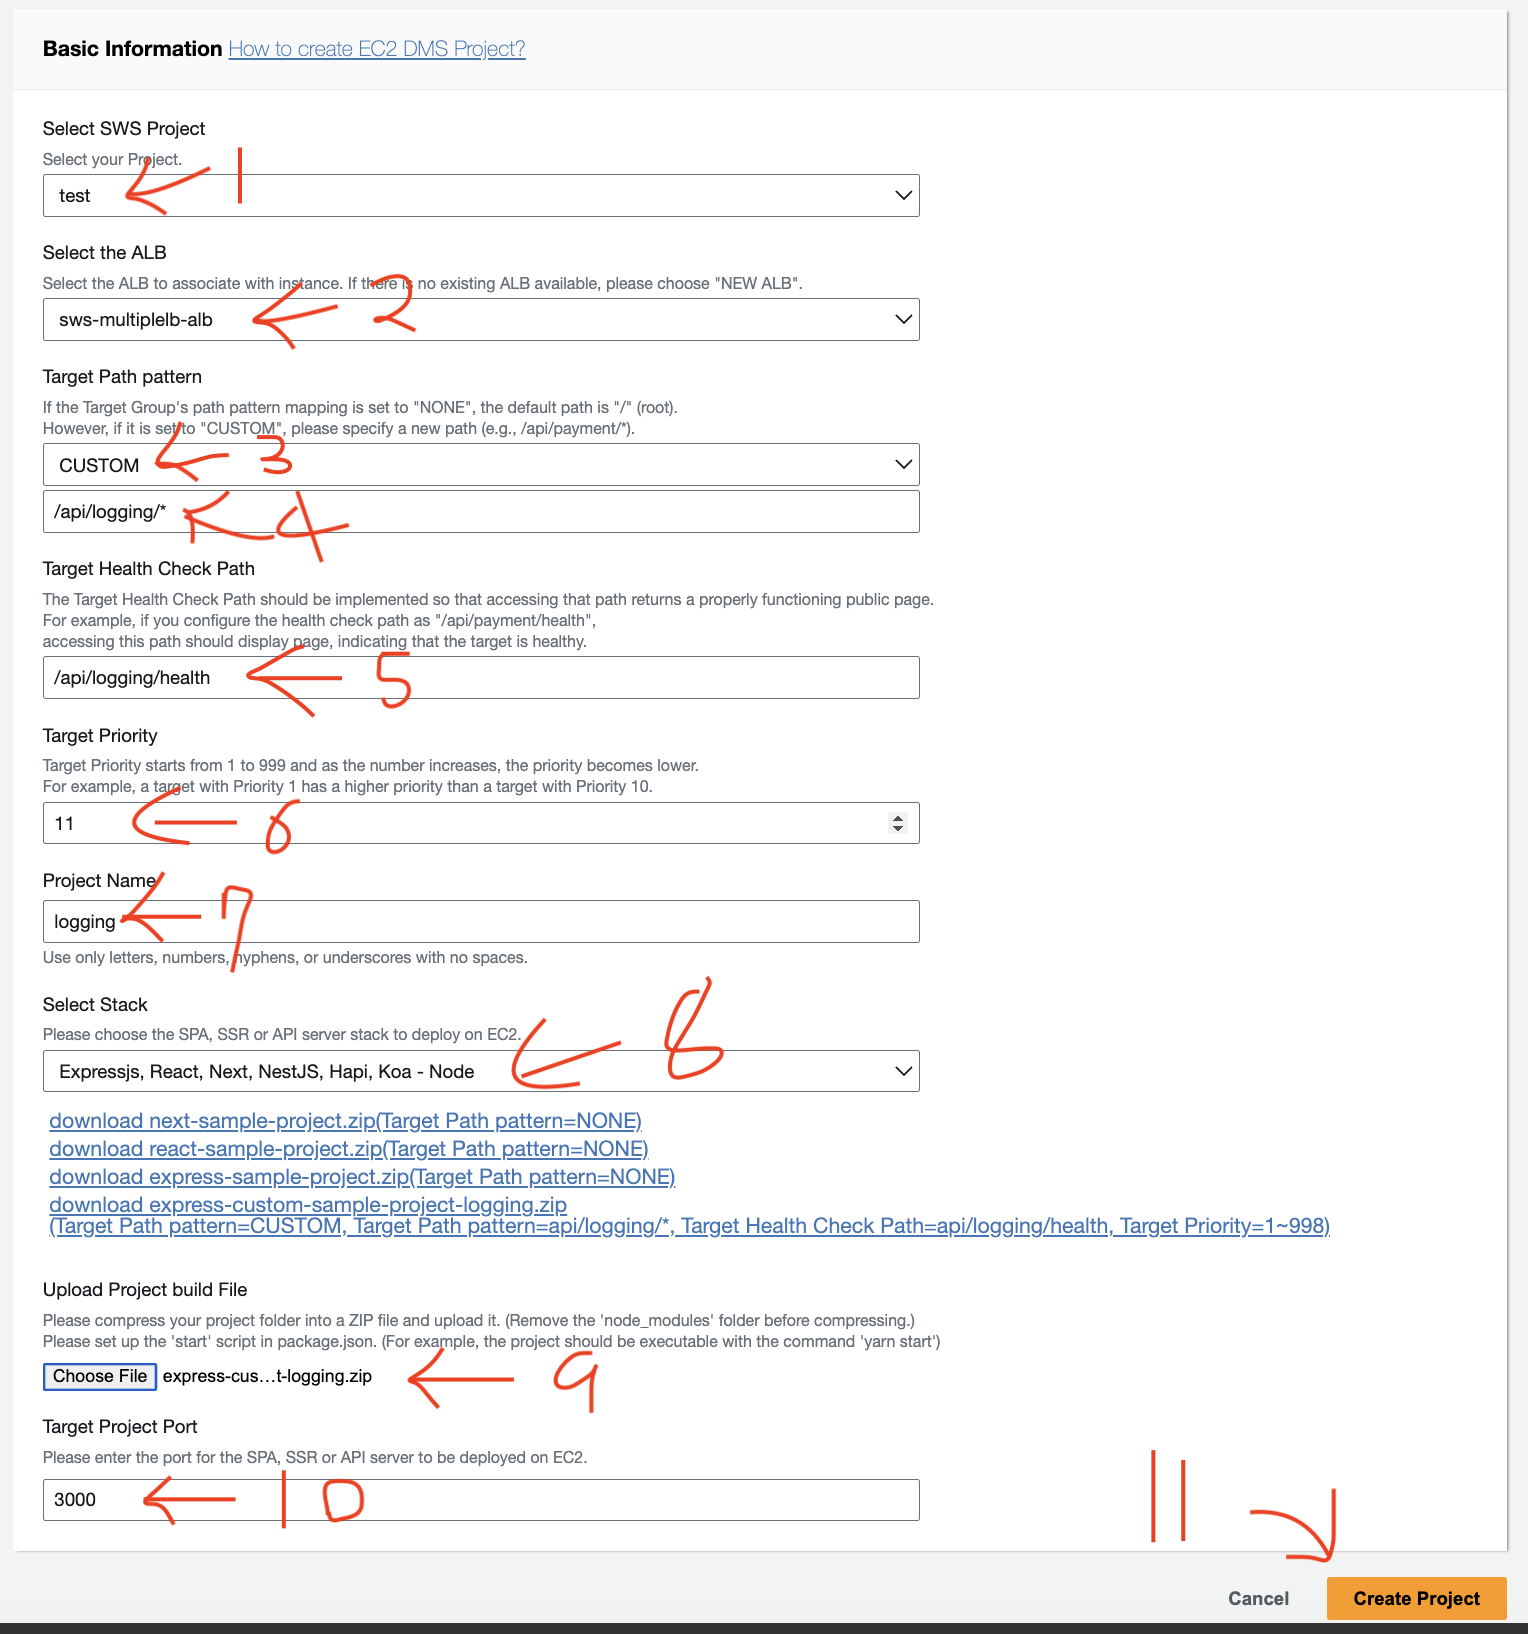
(1) Select the SWS Project.
(2) The Select the ALB option allows you to choose whether to deploy the project to EC2 instances by creating a new Application Load Balancer (ALB) and connecting it or by connecting to an existing ALB. If you want to deploy to a new ALB, select NEW ALB.
(3) Select CUSTOM for the Target Path pattern.
(4) Enter the prefix /api/logging/* as indicated in the code example above.
(5) Enter the health check path /api/logging/health as specified in the code example above.
(6) Set the target priority to a value between 1 and 999.
(7) Enter the Project Name.
(8) Select the stack for the project to be deployed. (Currently, Java Jar builds or nodejs project are supported.)
(9) Upload the java -> project's build file(jar file), nodejs -> project folder zip file . Please carefully read the instructions above Choose File before uploading the file.
(10) Enter the port of the project to be deployed in the Target Project Port. The default port will be filled in if you selected the project stack above.
(11) Click the Create Project button.
Step 3. Proceed similarly to Step 2, Deploying the Spring Boot server while connecting it to an existing ALB (example product Spring Boot server).
- example code
package com.example.demo;

import org.springframework.stereotype.Controller;
import org.springframework.web.bind.annotation.GetMapping;
import org.springframework.web.bind.annotation.RequestMapping;
import org.springframework.web.bind.annotation.ResponseBody;

@Controller
@RequestMapping("/api/product")
public class TestController {

    @GetMapping(value = "/health")
    @ResponseBody
    public String healthCheckPage () {
        return "health";
    }

    @GetMapping(value = "/order")
    @ResponseBody
    public String order () {
        return "Order SUCCESS";
    }

    @GetMapping(value = "/order/cancel")
    @ResponseBody
    public String cancelPayment () {
        return "Order Canceled";
    }
}