Azure Bot for SwiftLint and Detekt
With the Azure DevOps Bot integration, you can analyze your SwiftLint and Detekt reports and post the report details under the opened PR. You can also modify the PR status. For integration, there are some steps to follow that are necessary for each platform.
Azure DevOps Bot for SwiftLint
Step 1
First, to generate the report output, the SwiftLint component needs to be added to the workflow. We add the SwiftLint component after the CocoaPods install step.
To use the Azure Bot, we add the 'Azure DevOps Bot for SwiftLint Report' step right after running SwiftLint.

Step 2
You will find the variables that need to be specified inside the bot component. These can be provided either by adding them to environment variables or by directly entering values within the component.

Since one of the required variables will be the Azure DevOps Personal Access Token, Appcircle recommends using Environment Variables and encrypting variables like tokens that could pose a security risk.

Step 3
After setting all the variables, you can open a PR through your Azure DevOps organization to trigger the bot.
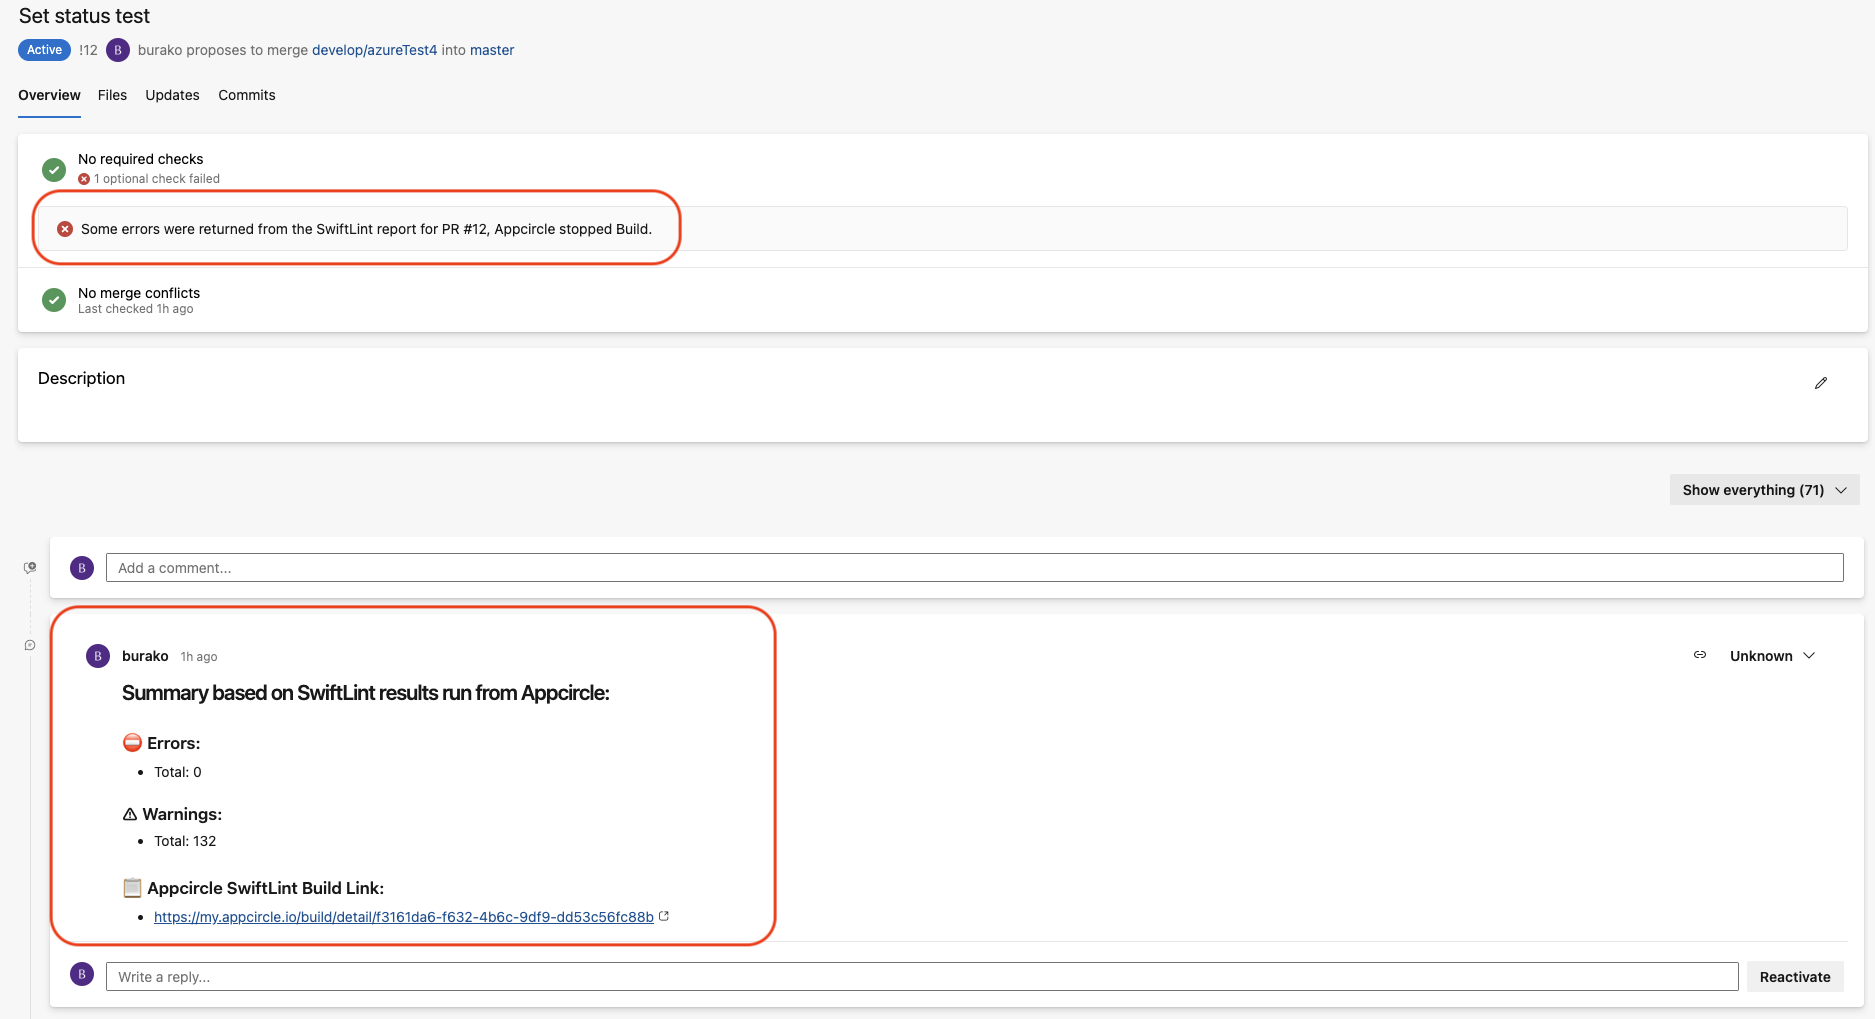
When the workflow is completed, the Azure Bot will automatically post a comment under the PR and change the PR status.
This component will work in builds that are automatically triggered by a configured trigger. To achieve this, you need to open a PR and set up the trigger.
If there are warnings or errors in the SwiftLint report, this workflow step will fail and stop the build.
For this component to work, a PR must be opened, and a trigger must be set up based on this PR. If the build is triggered manually, the component will not function.
When the workflow is completed, Appcircle, with the help of this step, will post a comment under the opened PR and provide a link to the build log, allowing you to quickly access it.
You can easily access the details through the comment and reach the build log via the link. This is how your open PR will appear when the step is completed.

Azure DevOps Bot for Detekt
Step 1
The first step for Android is to add the Detekt component to your workflow. Following the Detekt component, you should add the 'Azure DevOps Bot For Detekt Component' component to create a workflow.
Please make sure to run the Azure Bot component after Detekt. Otherwise, the Azure DevOps Bot For Detekt Component won't function.

Step 2
You will find the variables that need to be specified within the bot component. You can provide these variables either by adding them to environment variables or by directly entering their values within the component.

Since one of the required variables will be the Azure DevOps Personal Access Token, Appcircle recommends using Environment Variables and encrypting variables like tokens that could pose a security risk.
Step 3
After setting all the variables, you can open a PR through your Azure DevOps organization to trigger the bot.
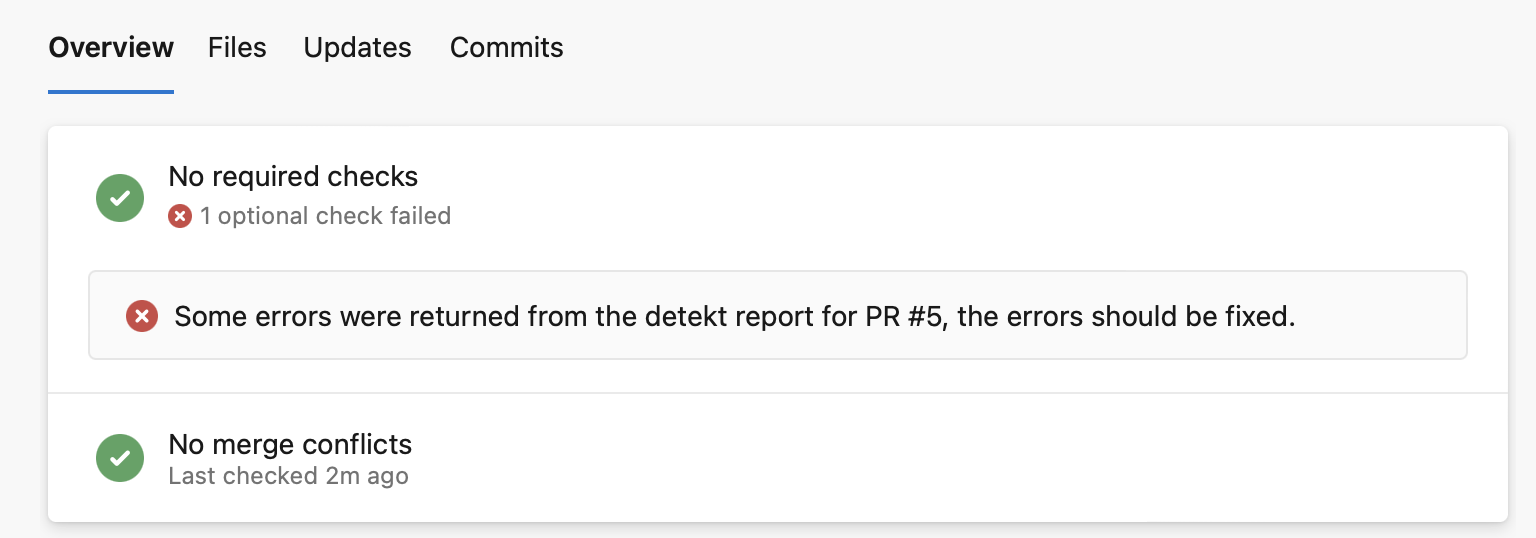
When the workflow is completed, the Azure Bot will automatically post a comment under the PR and change the PR status.
This component will work in builds that are automatically triggered by a configured trigger. To achieve this, you need to open a PR and set up the trigger.
If there are warnings or errors in the Detekt report, this workflow step will fail and stop the build.
For this component to work, a PR must be opened, and a trigger must be set up based on this PR. If the build is triggered manually, the component will not function.
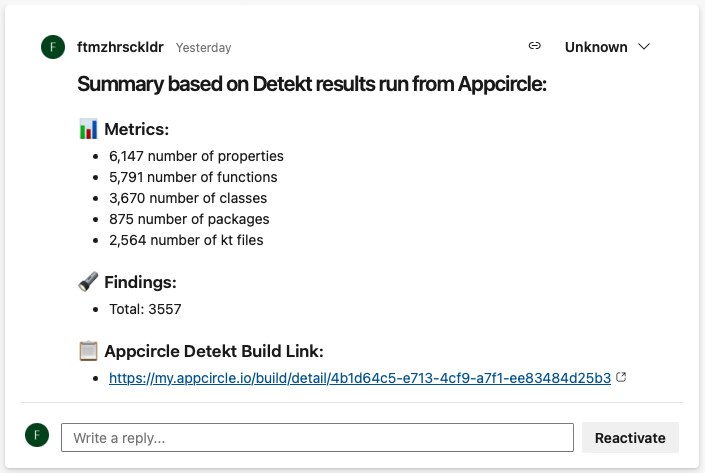
When the workflow is completed, Appcircle, with the help of this step, will post a comment under the opened PR and provide a link to the build log, allowing you to quickly access it.
You can easily access the details through the comment and reach the build log via the link. This is how your open PR will appear when the step is completed.

