What are Workflows and How to Use Them?
- iOS
- Android
- React Native
- Flutter
A workflow is a ladder of steps taken to build your applications.
Each step has a different purpose and the workflow can be customized by modifying step parameters and inputs, running custom scripts, or re-ordering steps.
Workflows allow you to have complete control on your build process and enhance it with third-party services and features.
Please note that modifying workflow steps may cause your builds to fail, so utmost care is recommended when editing workflows.
Setting Up Workflows
To access the workflow editor for a build profile, click the Workflows button in the context menu of the build profile, accessible from the top of the profile details.
.png)
The workflow list will be displayed. To view the Workflow Steps of a workflow, click on it from the workflow list.
.png)
To create a new workflow, press the "New" button at the top of the workflow list and select a template from the default workflows. Then edit the workflow name and press enter. You can also upload your workflow as a YAML file.
.png)
To rename/delete a current workflow, press the "Edit" button at the top of the workflow list and then click on the context menu that appears next to the workflow items.
.png)
You can use the "Clone" option to create a new workflow based on the currently available ones. You can select different workflows for different build scenarios (e.g. separate workflows for production and development).
.png)
Worfklow Steps
.png)
Appcircle will build your application with the steps defined in the workflow. Steps will be executed in order from the top to the bottom.
You can customize each step for specific configurations with your application structure. Step parameters can be modified, outputs of each step can be used in another step and step versions can be selected accordingly.
Workflow Marketplace
Appcircle's powerful Workflow Editor has a built-in Workflow Marketplace that allows you to select and insert an unlimited amount of steps to your workflow.
You can find the full list of available workflow steps in our workflow marketplace at:;
You can add platform-specific workflow steps, custom scripts, and other steps into your workflow and re-order them as you like. You can also remove the steps you don't need. You can backup your current workflow by clicking the Download YAML button at the bottom.
To access the Workflow Marketplace, go to the Workflow Editor and click on the Edit button:
.png)
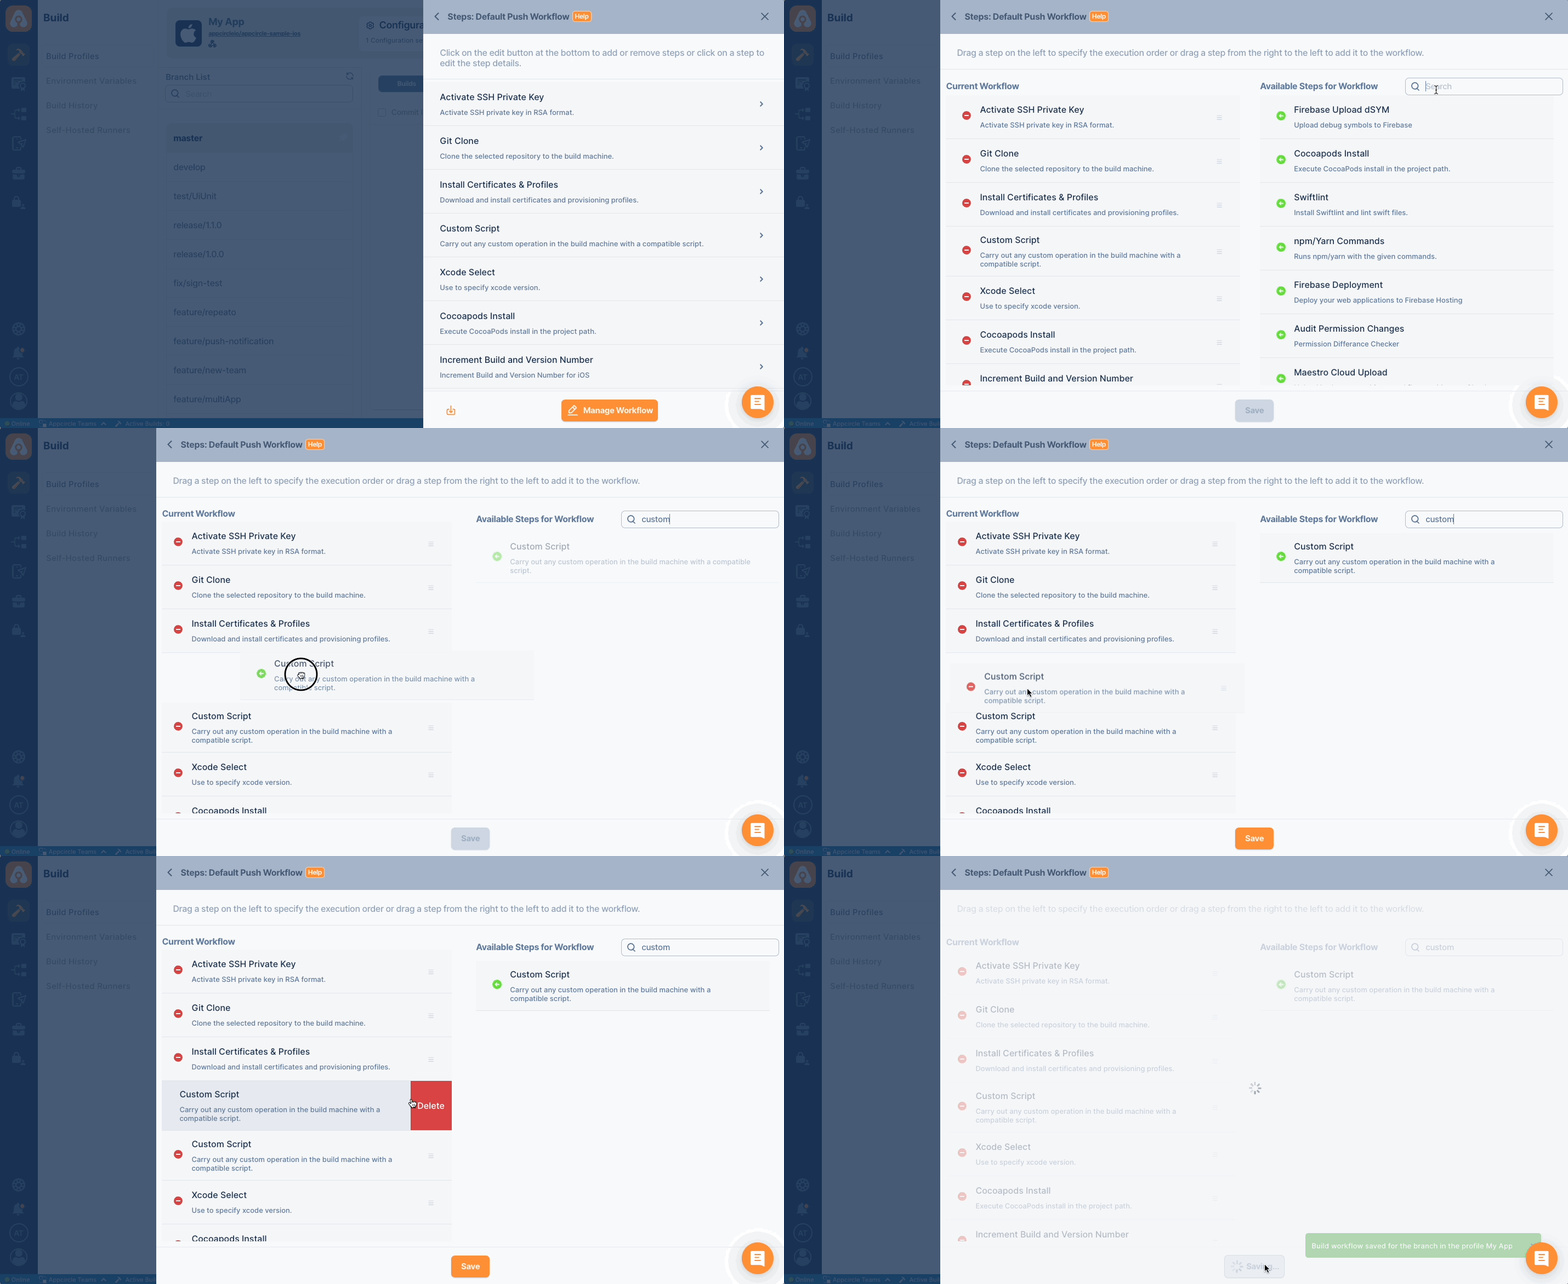
You will see the Workflow Marketplace on the right and your Workflow steps on the left. You can now drag and drop steps into your workflow. Any unwanted workflow steps can be removed by clicking on the delete button on the right side of each step.
You can also reorder steps so that they will be executed in the order you specify.
Editing Workflow Settings
Each workflow step has its own set of configuration options, which can be set by clicking on the step in the workflow screen.
The first three items are common for all steps and they are set individually for each step:
Step Execution Active: To enable/disable the step execution without removing it from the workflow
Continue with the next step even if this step fails: If a step is optional or its result should not cause a build error, you can select this option to continue the workflow if this particular step fails. In default workflows, this option is
onfor specific steps. And since this step is active, the build status will appear as "Warning" when other steps in the build are successful. Detailed explanation about this state is given in the Build Warning Status section.Workflow Step Version: You can select a specific version of a step with which to execute your build. If you select a version with an asterisk (*), you will receive the minor updates to the workflow step automatically. The major versions may include added or removed input fields and manual version selection is required for major version updates.;
The items in the "Inputs" section are specific to that step. The reserved environment variables are assigned to these fields by default and the values of these variables are set in the build configuration.
.png)
Build Warning Status
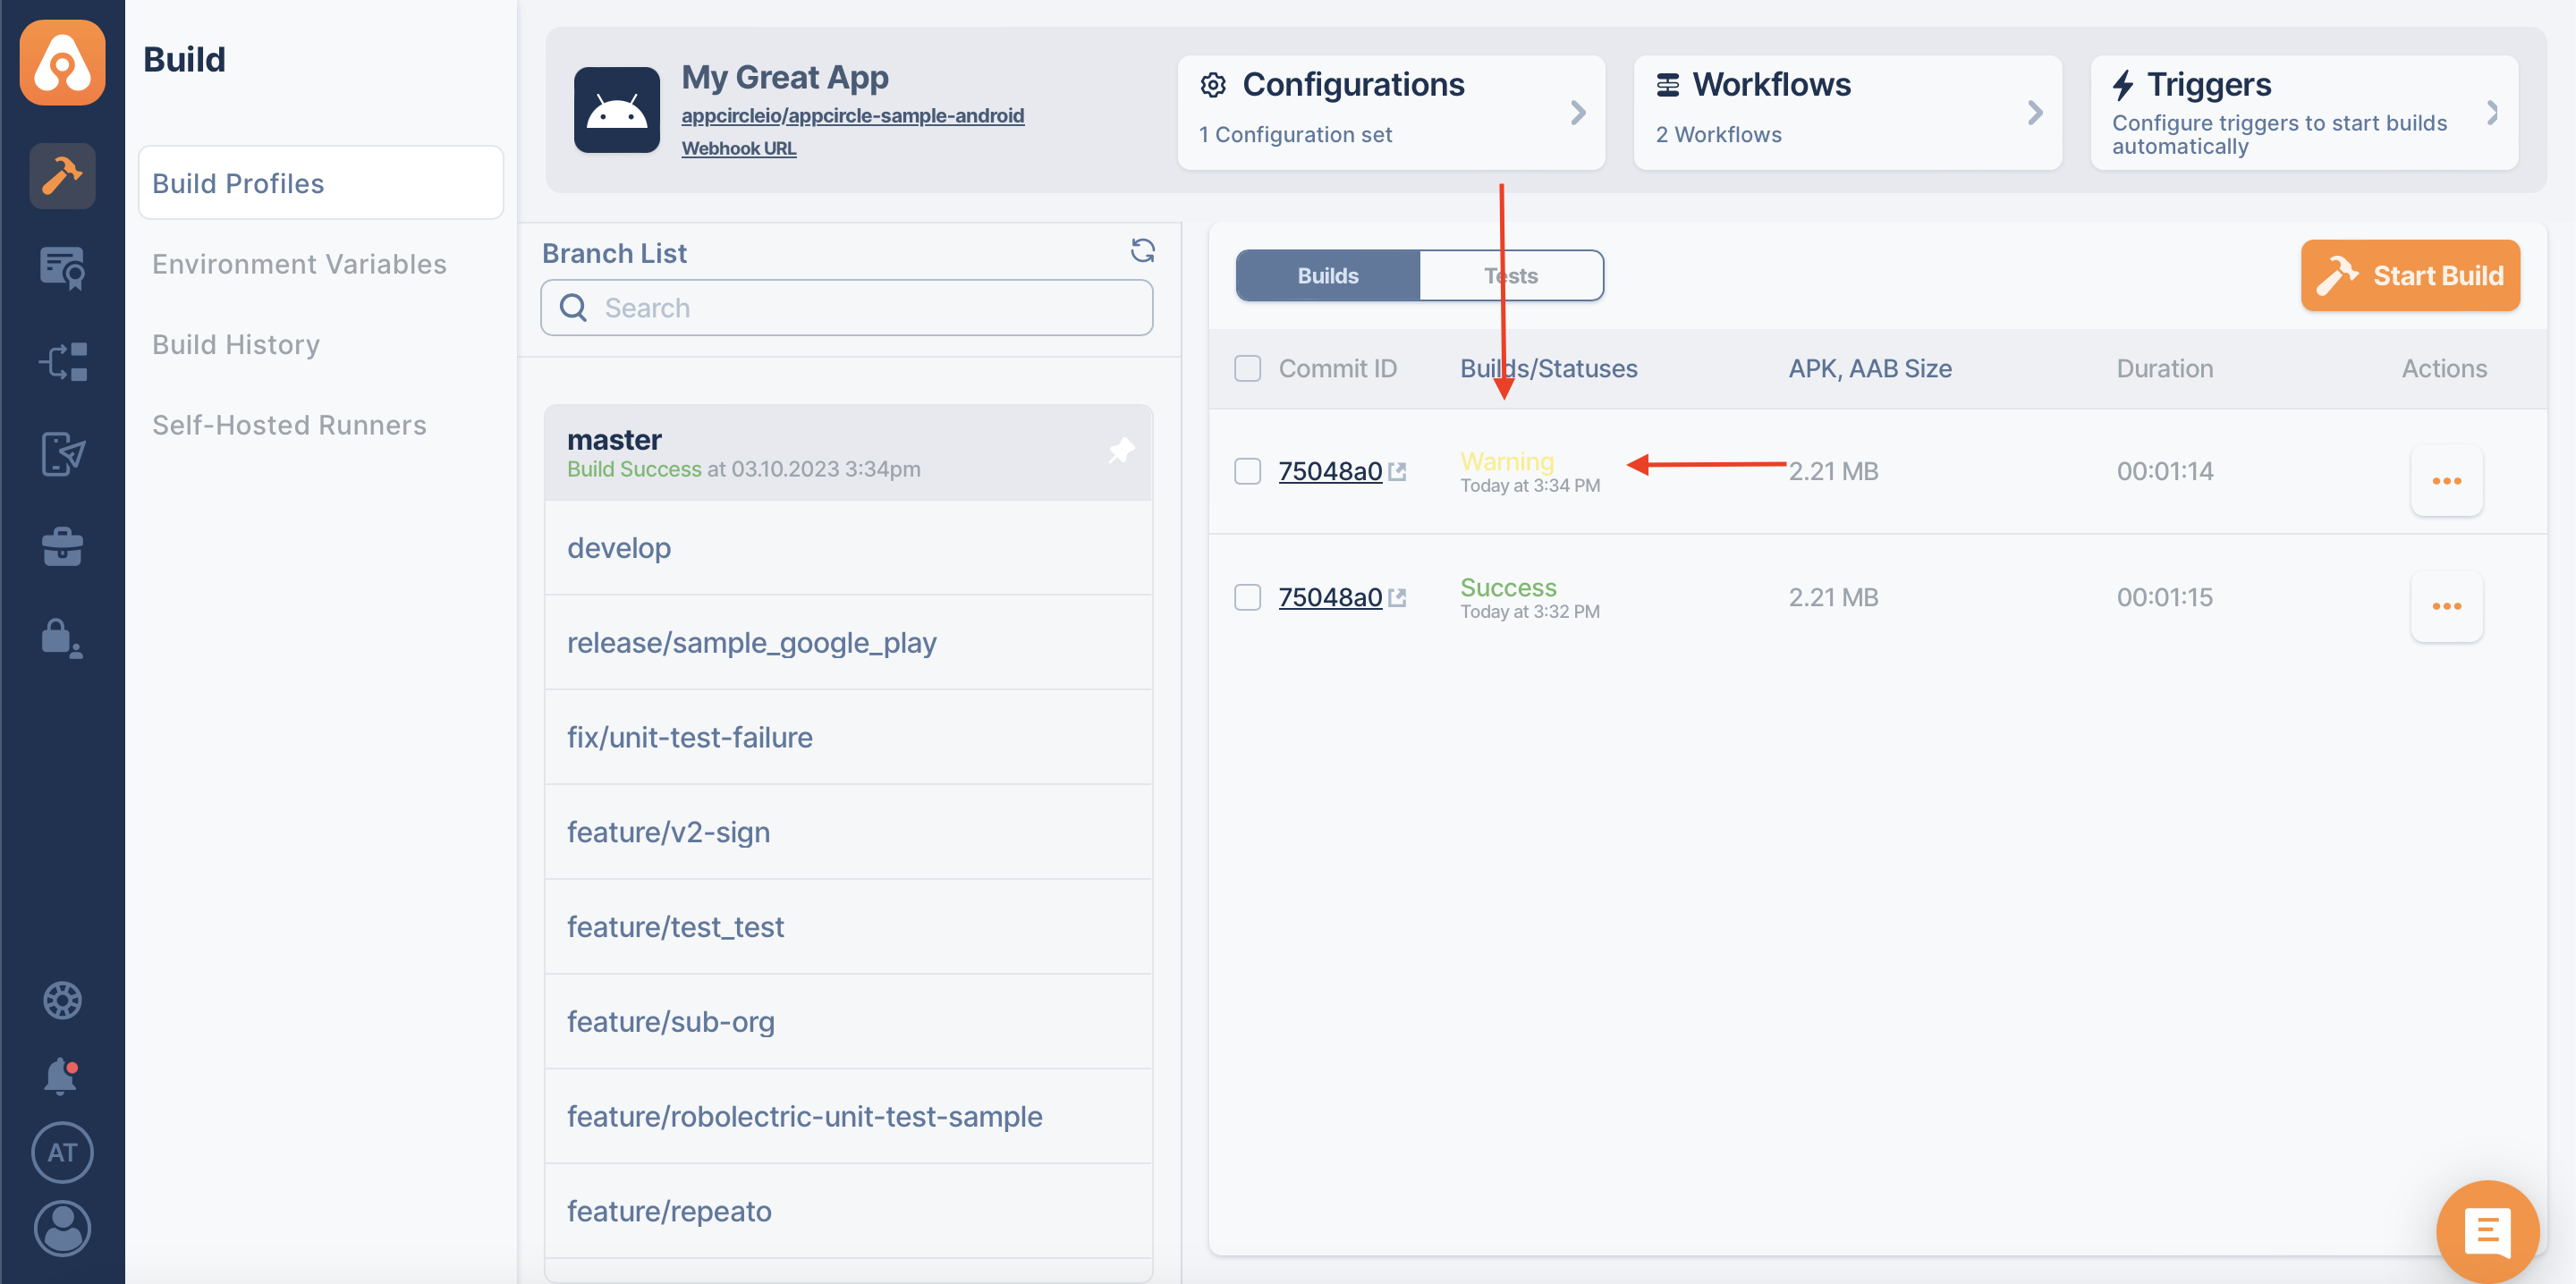
When we start a build, if we have activated the "Continue with the next step even if this step fails" setting for a component we use in the workflow and this step fails during the build, Appcircle will show the build status as "Warning" if the build is completed successfully for other steps.
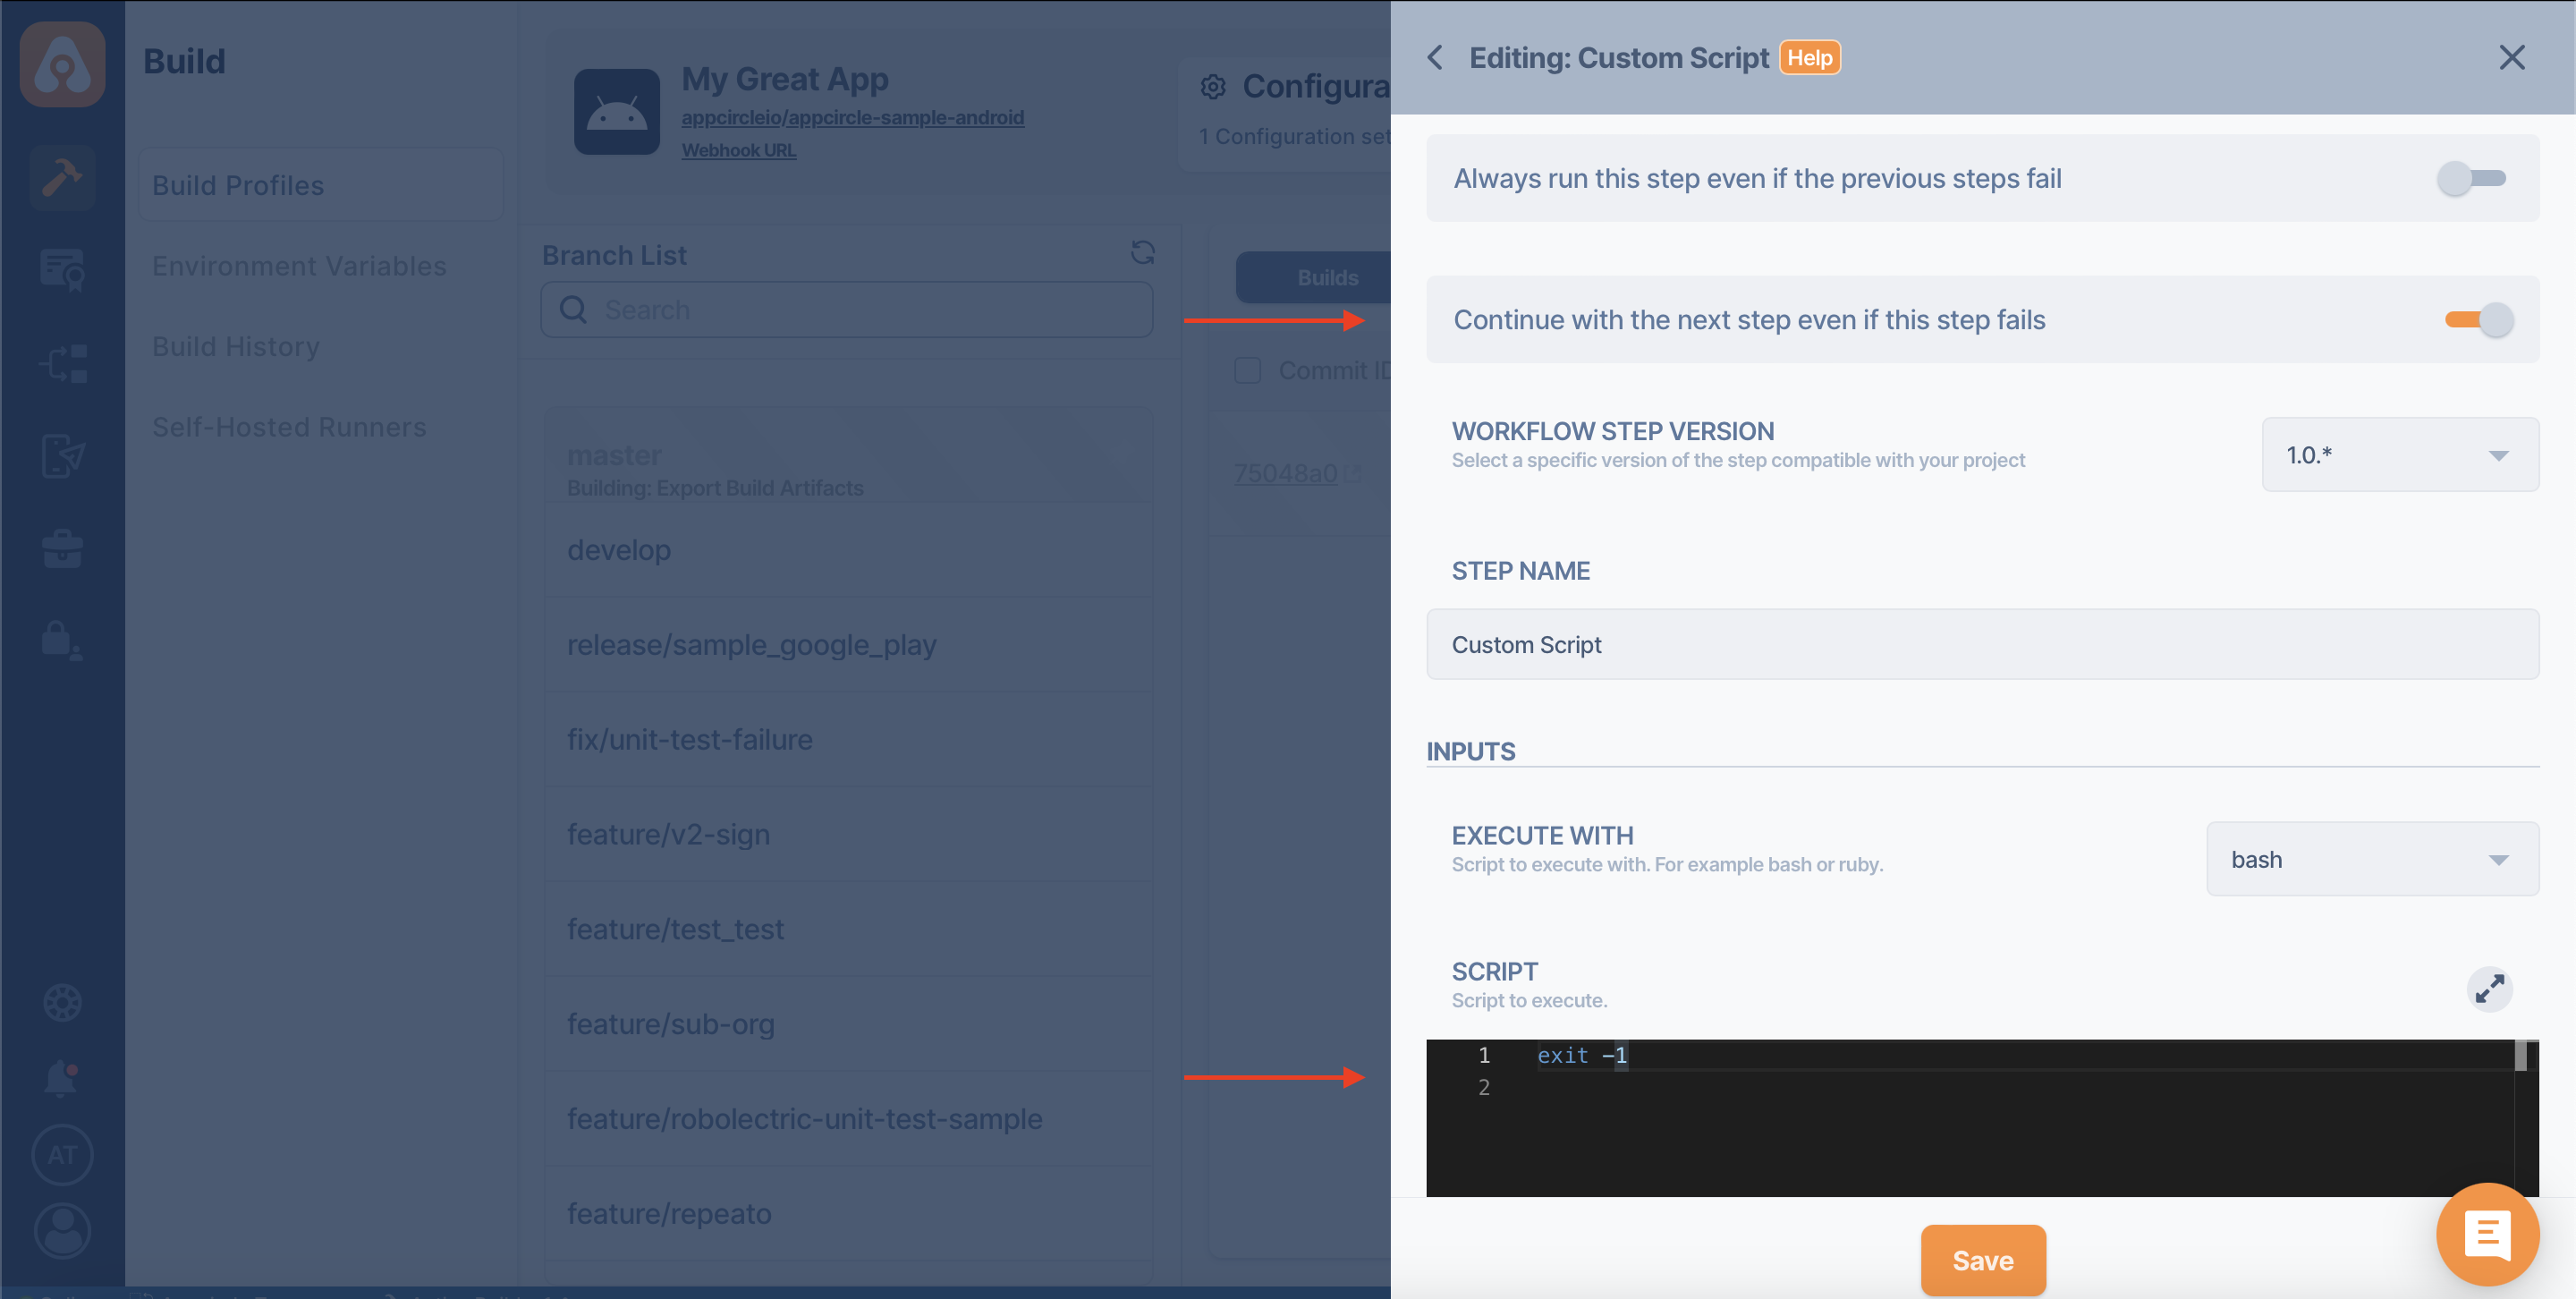
In order to simulate the warning state and see its results on the pipeline, we can basically write a script that will fail in Custom Script.
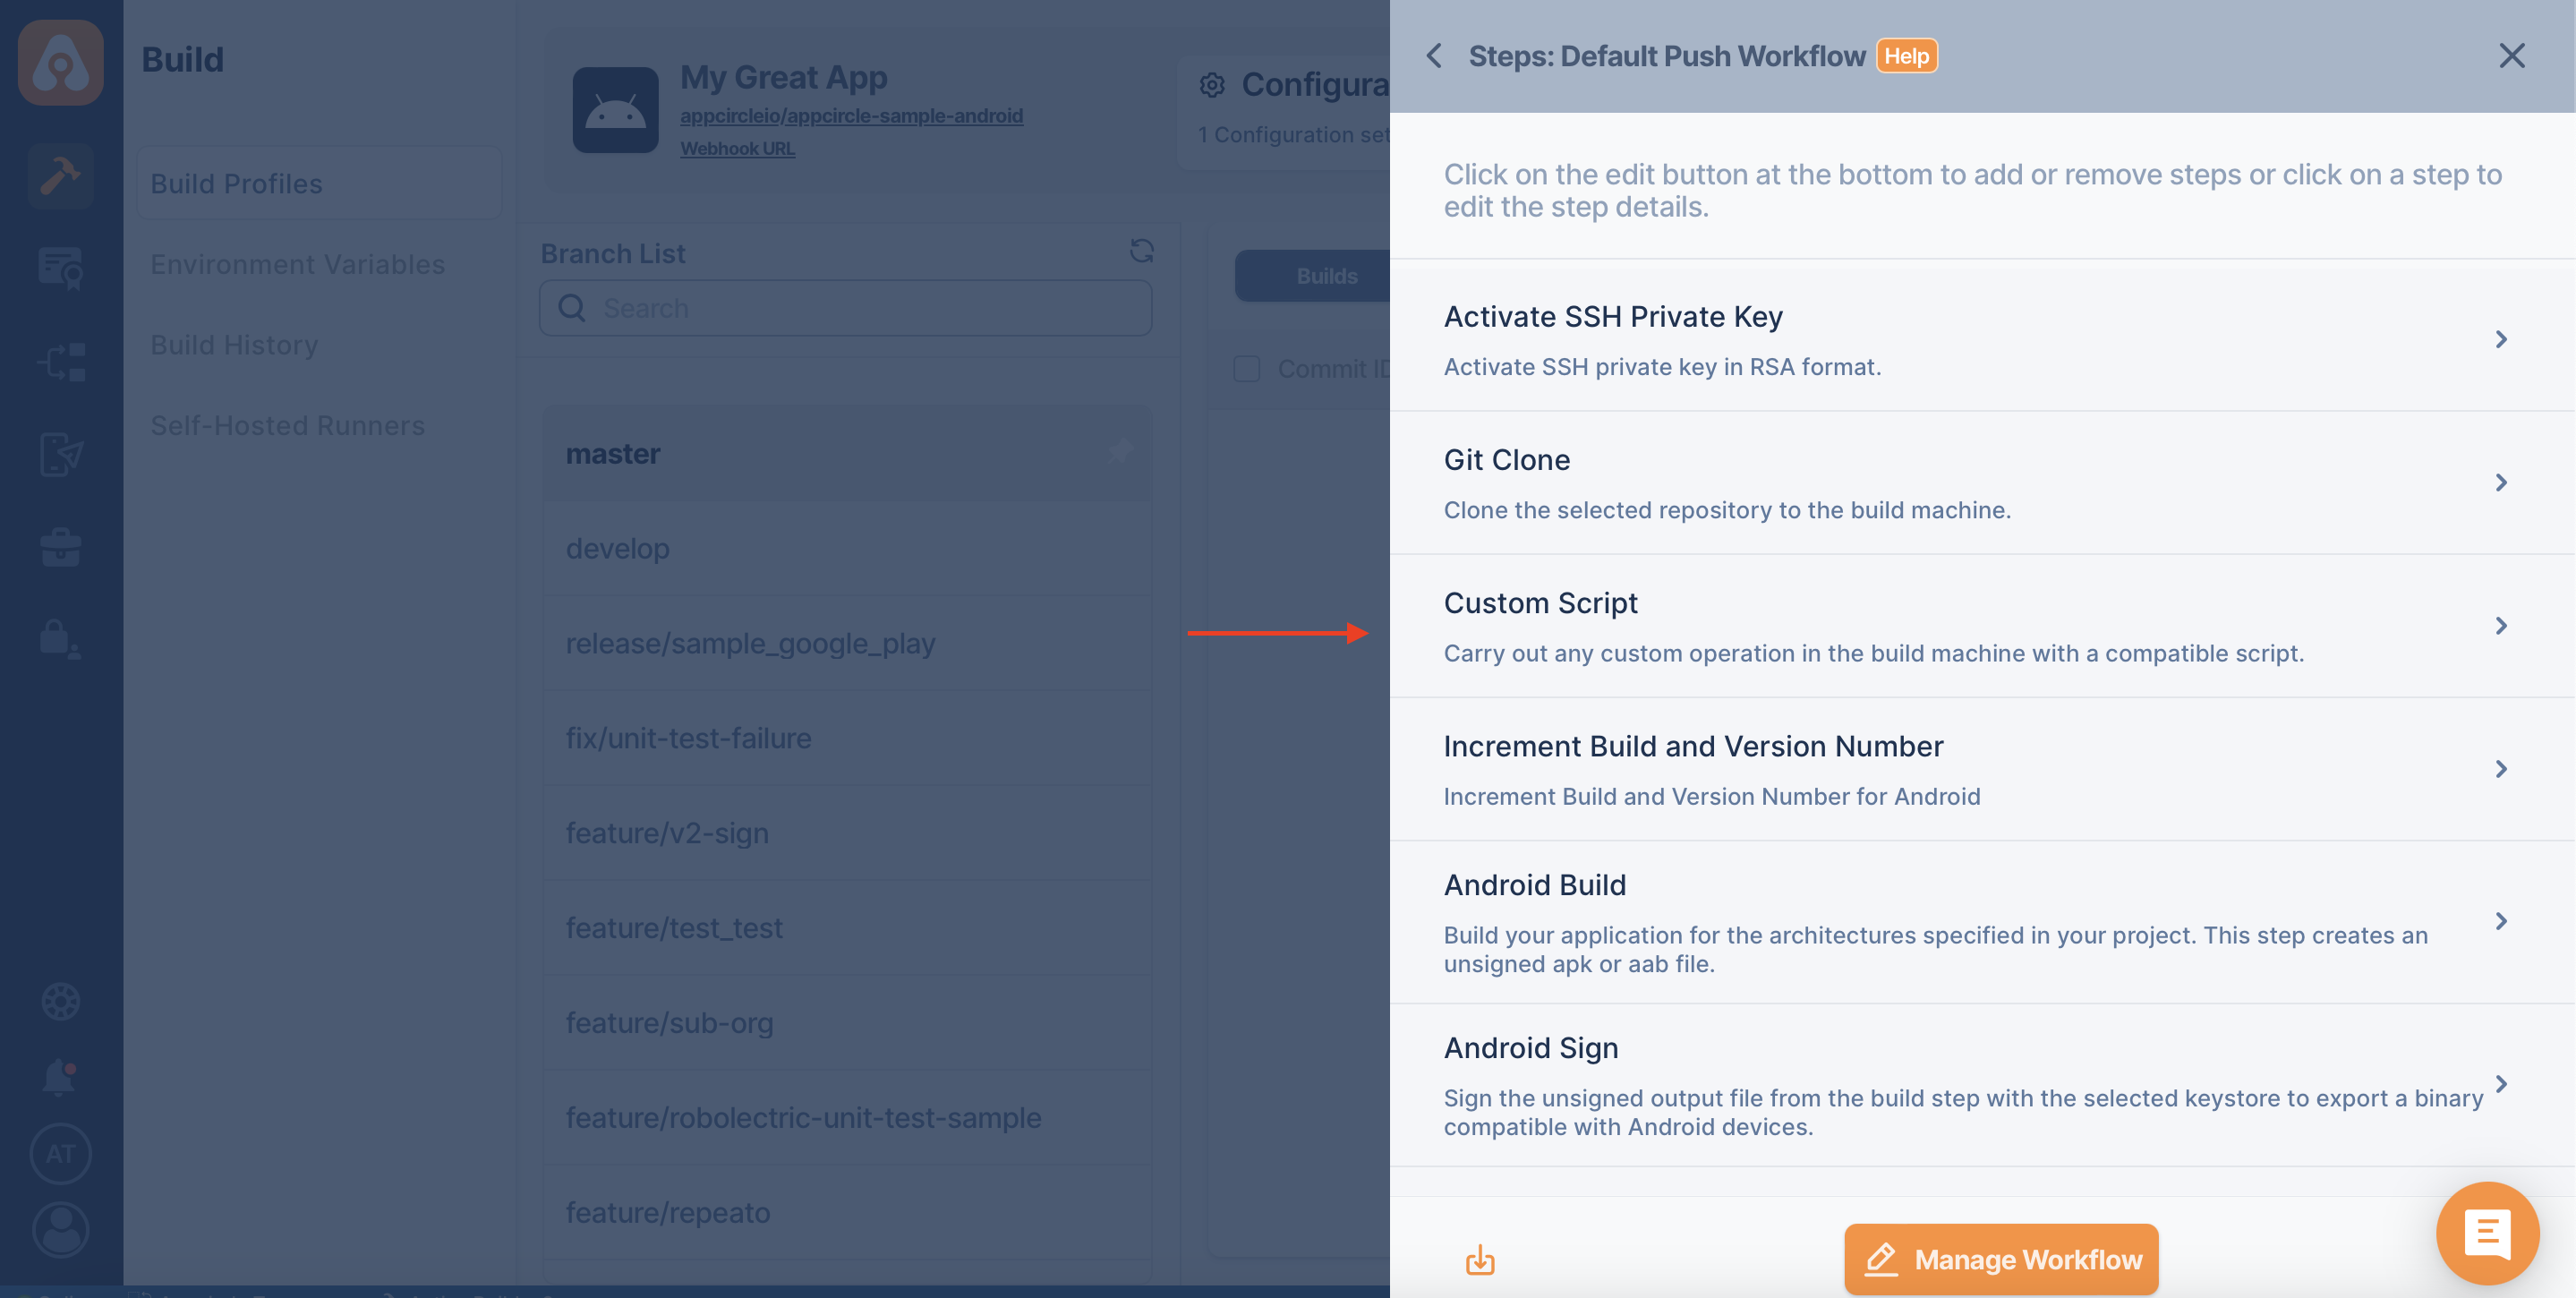
"Continue with the next step even if this step fails" must be on in this case.
We are starting a build, and we see that it fails in the pipeline.
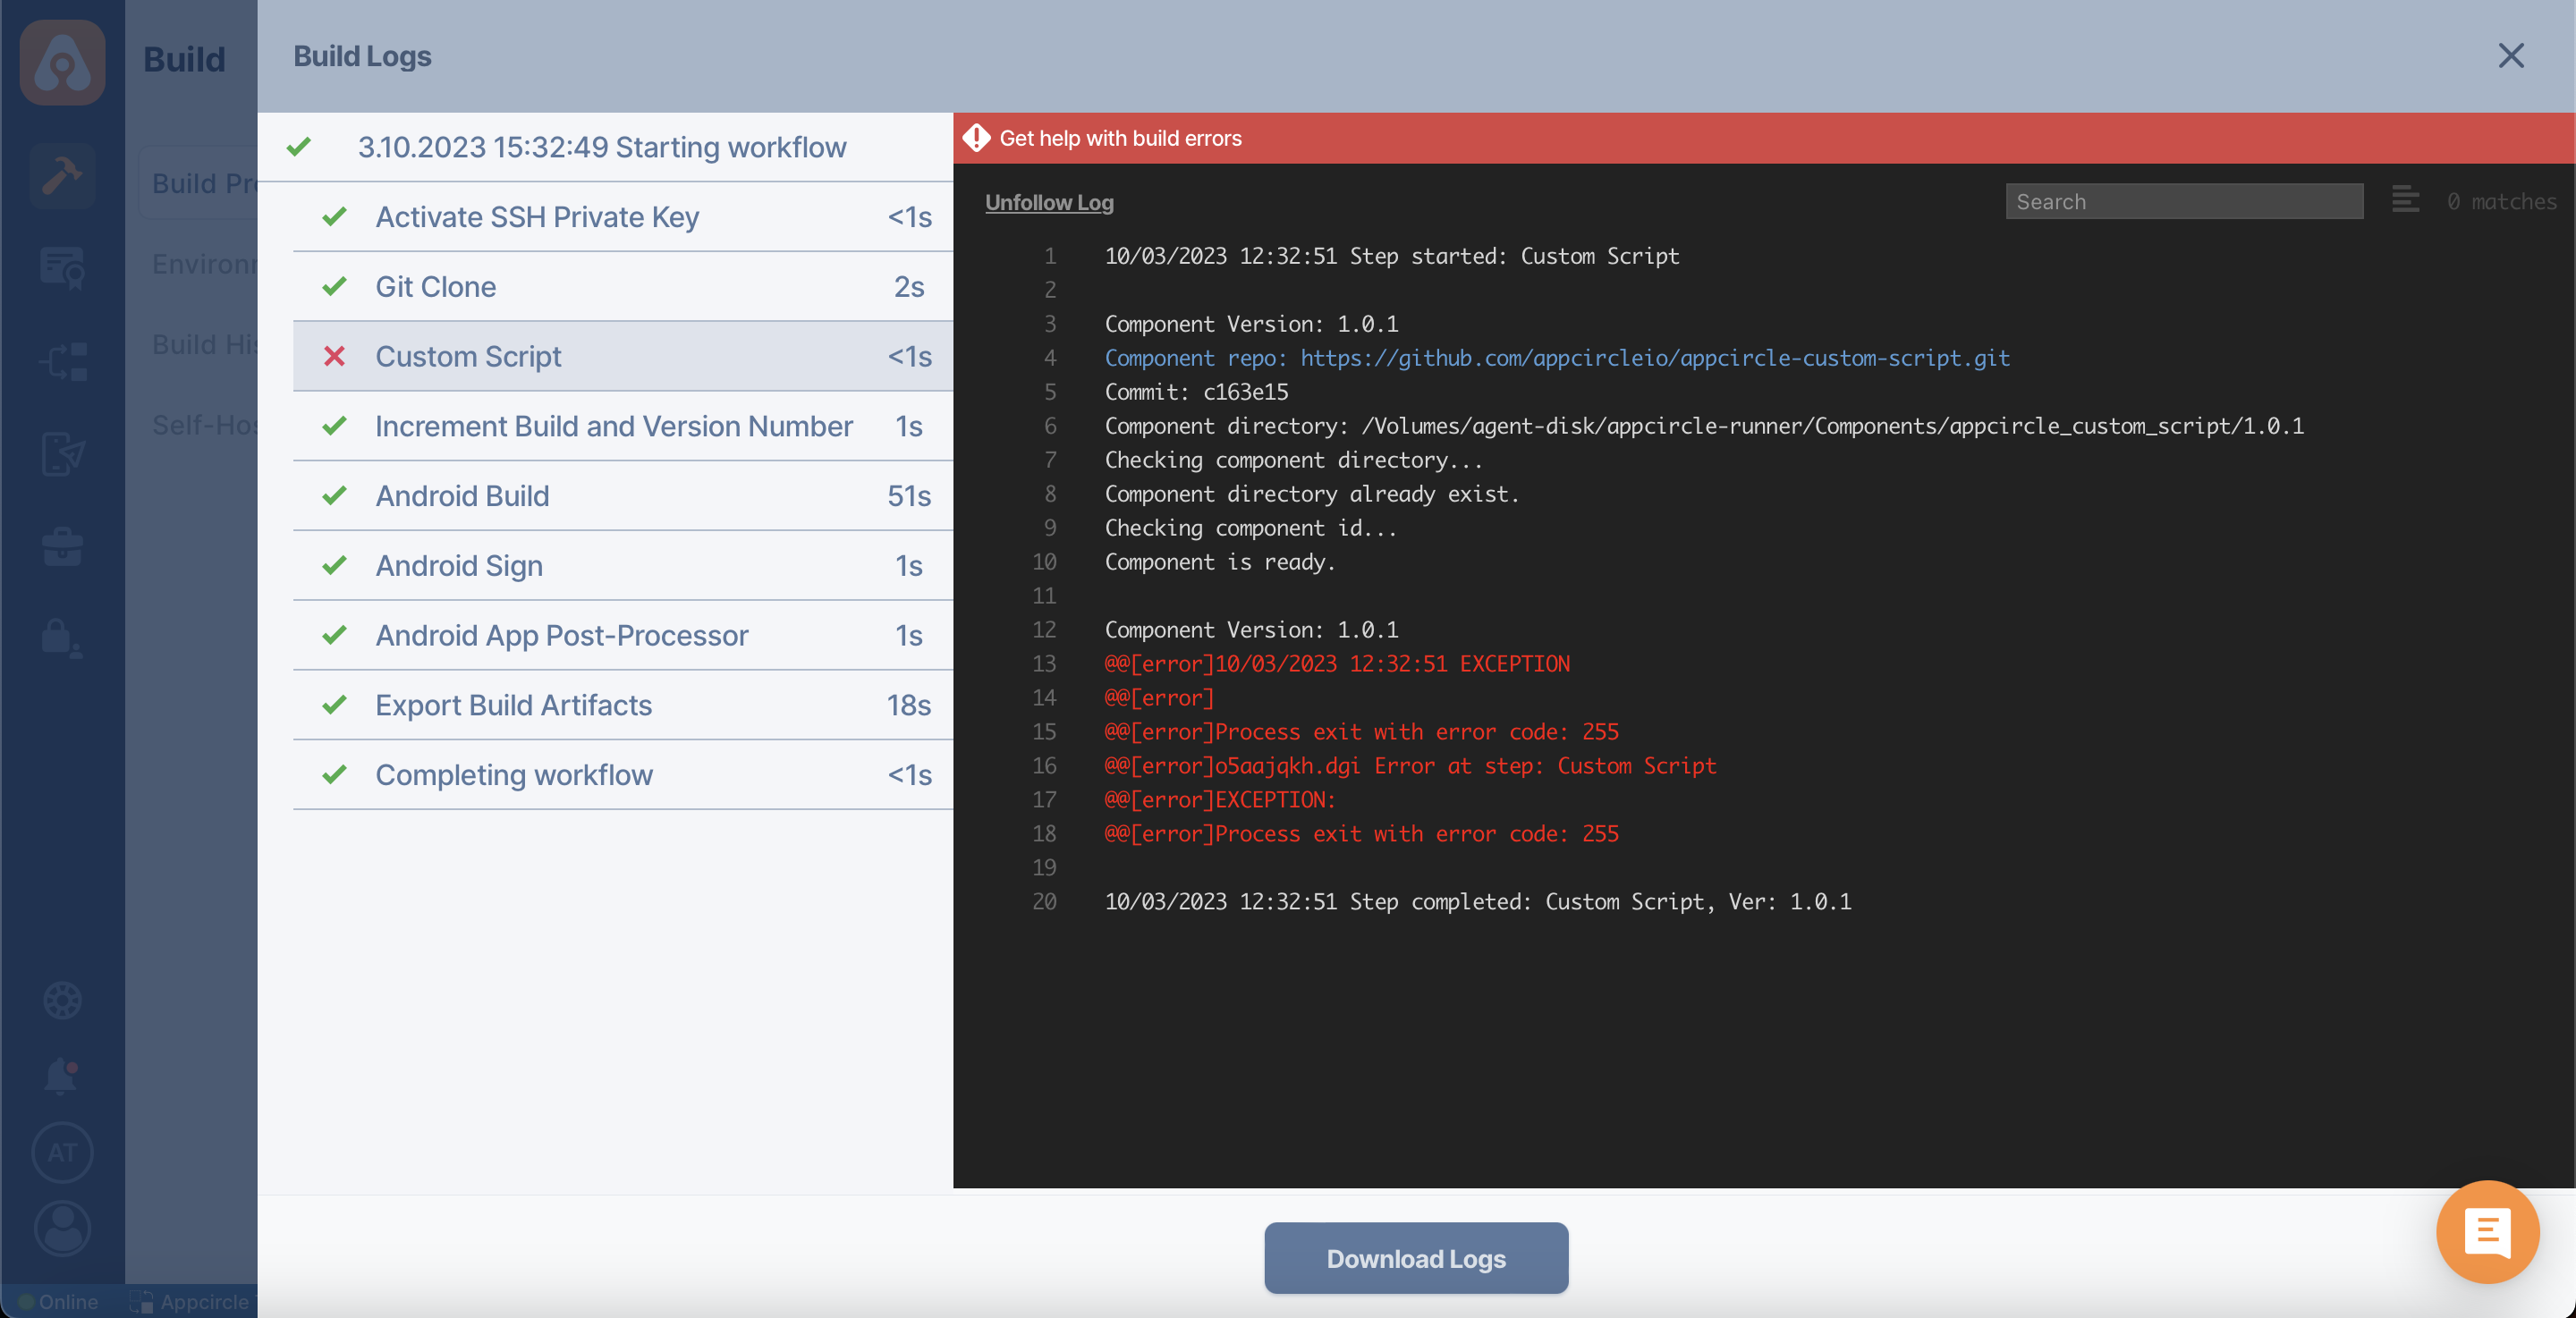
And the build status will now appear as "Warning".
