How to use ECS DMS
- After clicking the link below to access the SWS console web, proceed to log in to the AWS Turn Key Console.
- Once you have accessed the AWS Turn Key Console, click on
AWS ECS DMS.
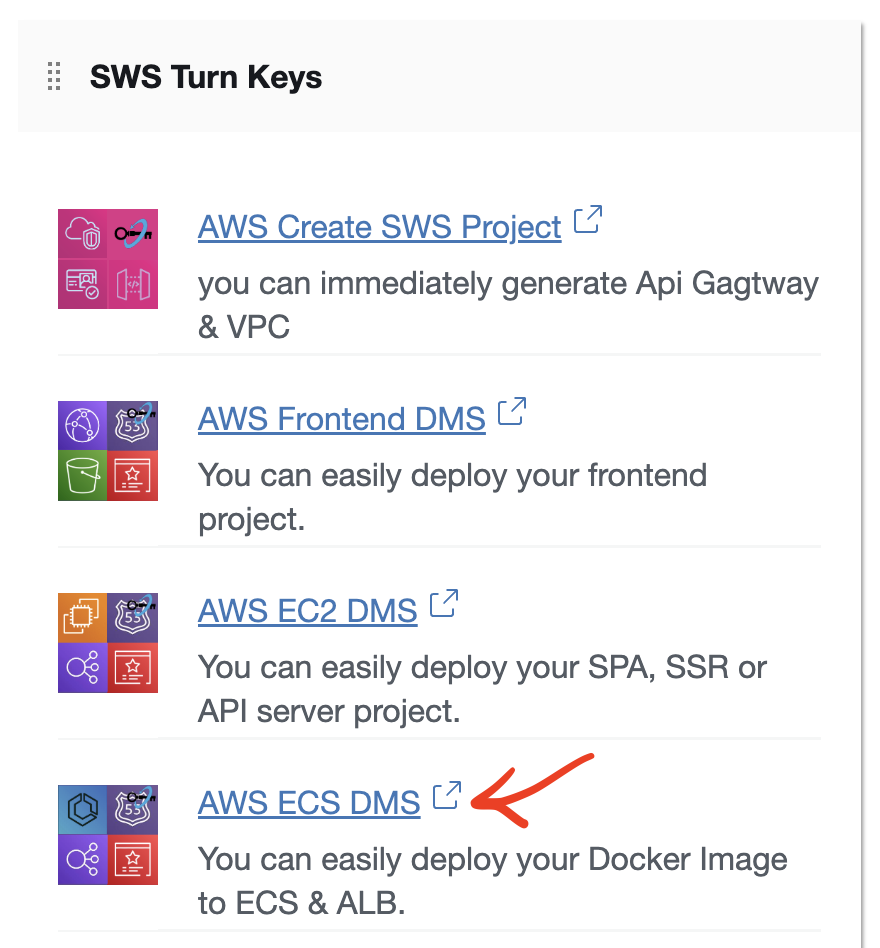
- Click on the
ECS Cluster IDof theECS DMSproject.

- The
Project Detailsprovide ALB & ECS Cluster Information, and connectingSSLandsubdomainsfrom a domain purchased throughRoute53to theALB.
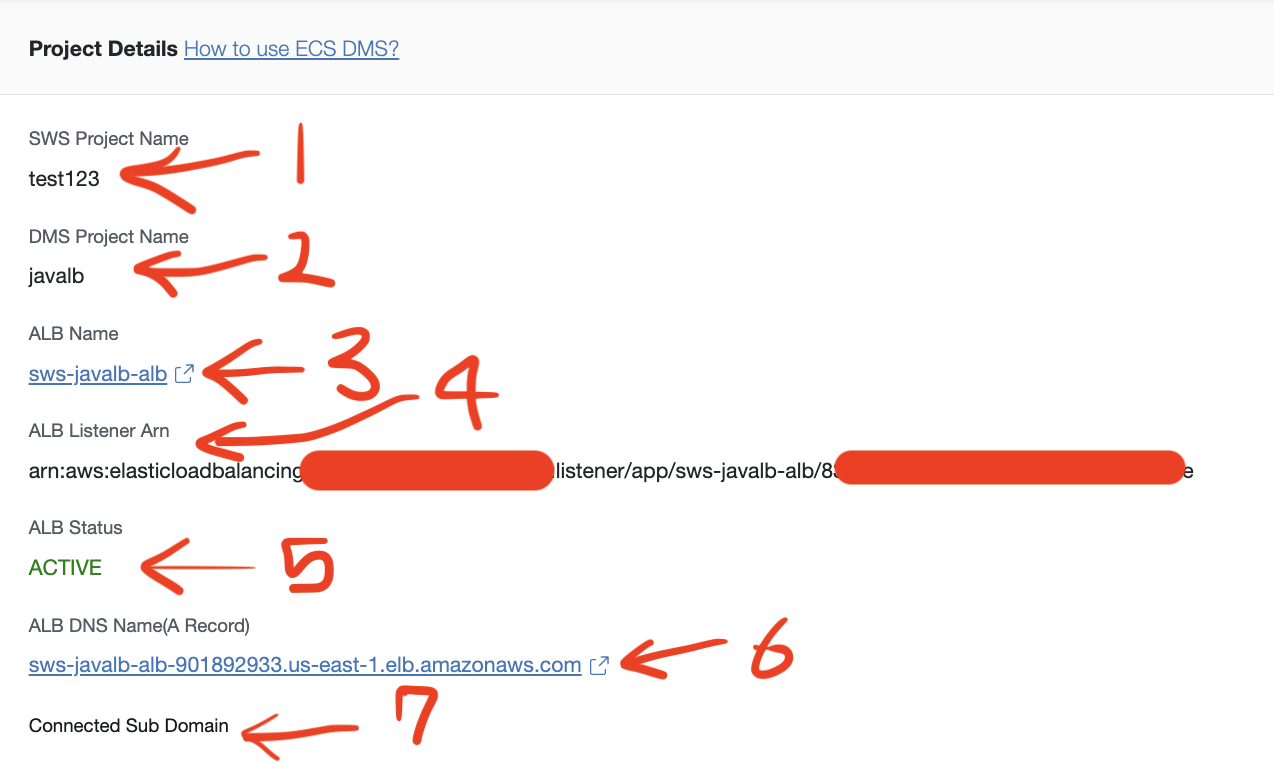
(1) It displays the name of the connected SWS Project(VPC).
(2) It shows the name of the connected DMS Project (ECS Cluster).
(3) It displays the name of the ALB connected to the ECS cluster's service.
(4) It shows the Listener ARN of the ALB connected to the ECS cluster's service.
(5) It displays the status of ALB."
(6) It displays the ALB DNS Name. You can check the deployed project by following this link.
(7) It shows the list of Sub Domains connected to the ALB DNS Name.
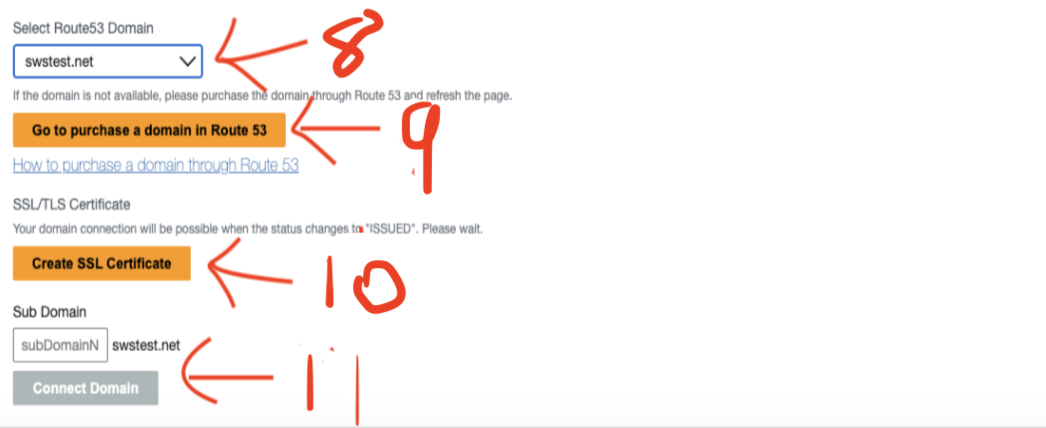
(8) Select the list of domains purchased through Route53.
(9) Click the Go to purchase a domain in Route 53 button to navigate to the Route 53 dashboard. If you are unsure how to make a purchase, refer to the documentation on How to buy a domain with Route 53.
(10) Click the Create SSL Certificate button to link the SSL certificate of the selected domain with ALB. When the Status is ISSUED, Sub domain connections are possible.
(11) For example, if you want to create the domain docs.abc.com, enter docs in the subdomain name input and click the Connect Domain button. This will link the ALB with the selected domain.
- The
ECS Servicessection provides functionality to redeploy services existing in the project'sECS clusteror createnew servicesto the cluster.
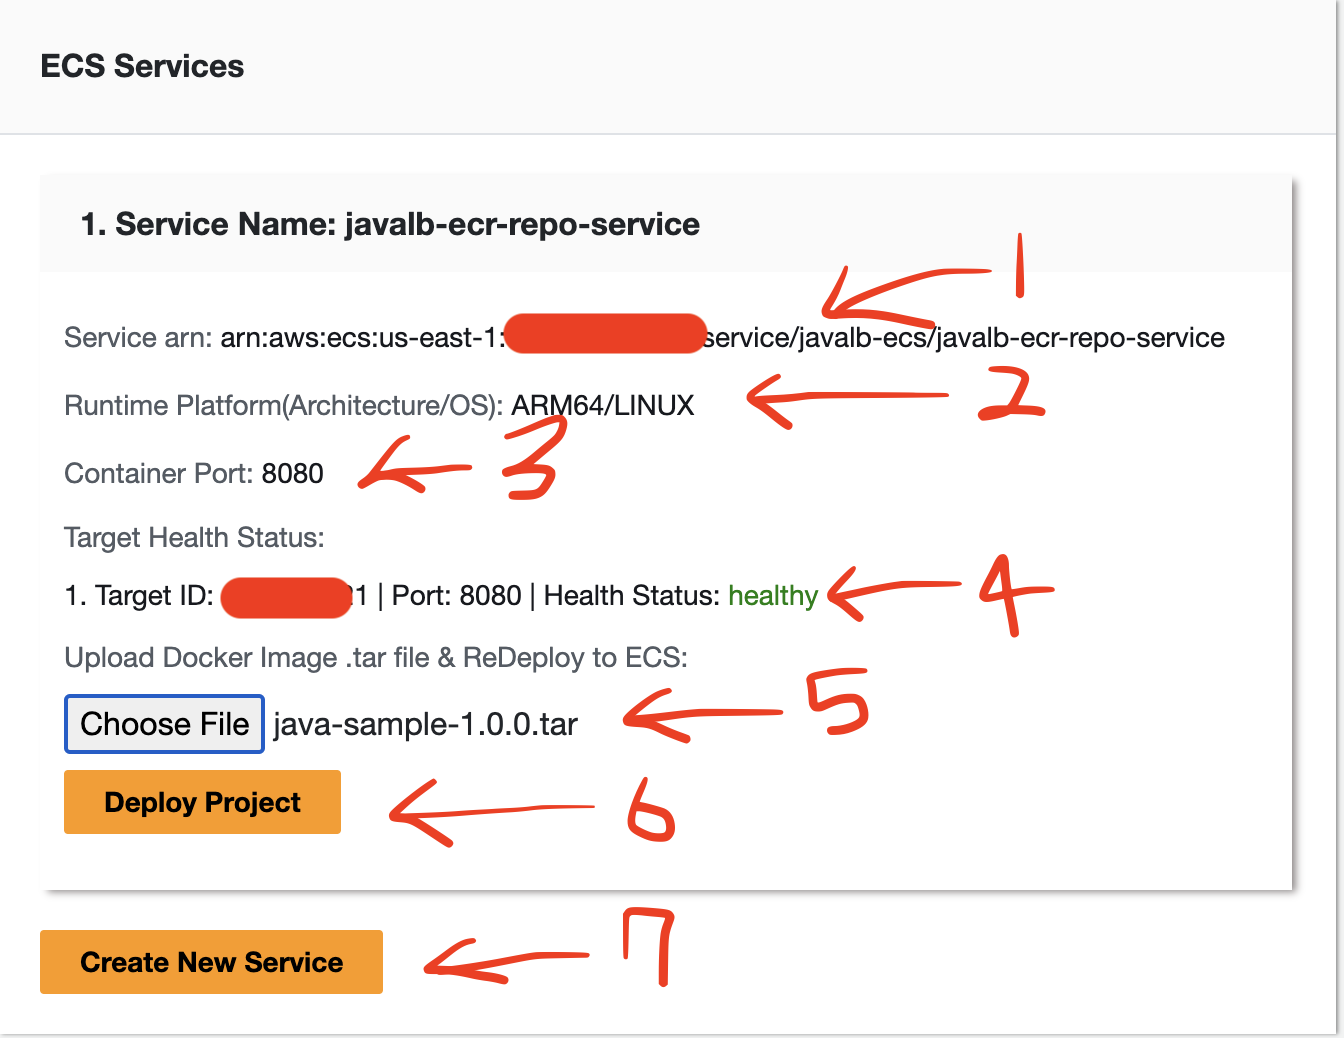
(1) It displays the Service Arn for the ECS Service."
(2) It displays the Runtime Platform information for the ECS Service.
(3) It provides the port information for the container.
(4) It provides the Task's Port information and Health Status information for the ECS Service.
(5) It provides the Task's Port information and Health Status information for the ECS Service.
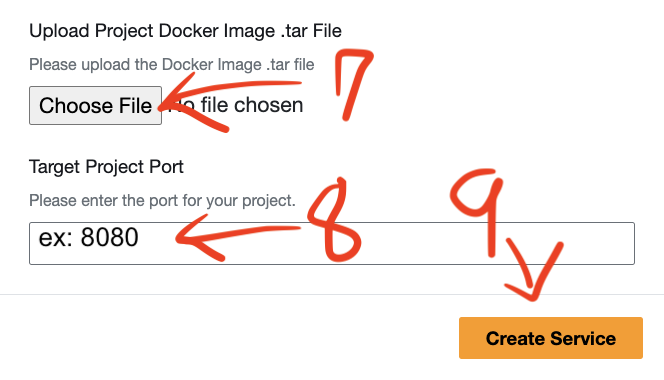
(6) Please use the following command to create the Docker image as a .tar file and then press the Choose File button to upload the file.
- create the Docker image as a
.tar file, Please replaceDocker_Image_Namewith the name of your Docker image.
docker save -o ./Docker_Image_name.tar Docker_Image_Name:latest
(7) Create New Service is a feature used to deploy a new service by creating a new Docker image in the respective project (ECS Cluster) and deploying it.
When the
Create New Servicemodal appears, please proceed with the following steps in numerical order:- Below is an example code for illustration purposes. In the provided example, the prefix is defined as /api/logging/*. Following that, a controller is configured to handle requests at the /api/logging/health path, allowing for server health checks.
var express = require('express');
var router = express.Router();

/* GET home page. */
router.get('/api/logging/health', function(req, res, next) {
  res.render('index', { title: 'Express' });
});
router.get('/api/logging/insert', function(req, res, next) {
  res.render('', { title: 'SUCCESS' });
});

module.exports = router;
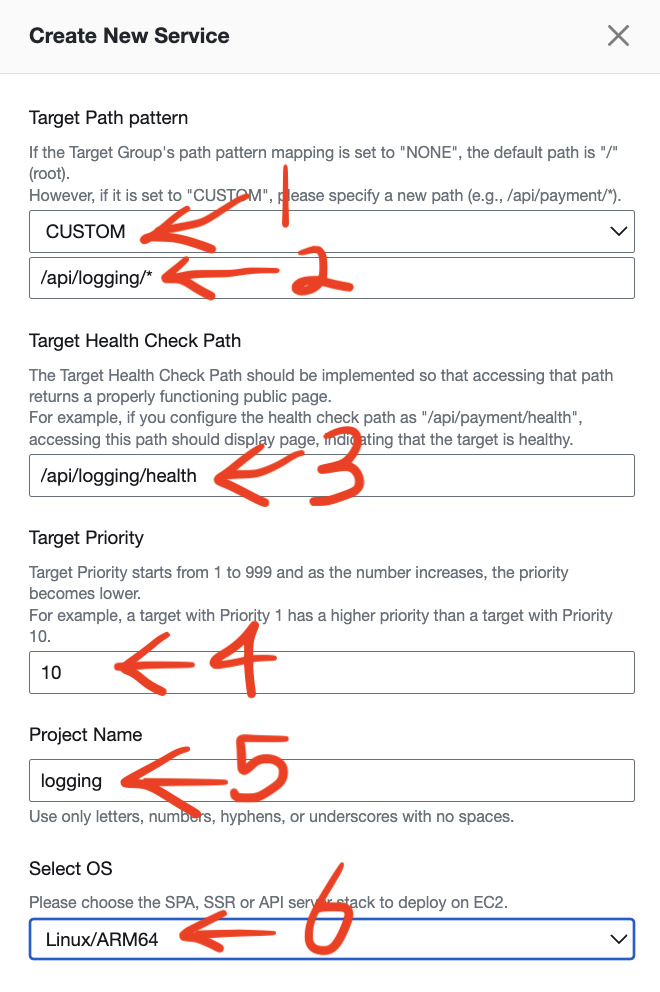
Select
CUSTOMfor the Target Path pattern.Enter the prefix
/api/logging/*as indicated in the code example above.Enter the health check path
/api/logging/healthas specified in the code example above.Set the target priority to a value between 1 and 999.
Enter the
Project Name.Select the
OSandarchitectureenvironment of your own computer where the Docker image was built. You can use the following command to check the OS and architecture of a Docker image.docker inspect --format='{{.Os}} {{.Architecture}}' Docker_Image_NamePlease use the following command to create the Docker image as a
.tar fileand then press theChoose Filebutton to upload the file.
create the Docker image as a
.tar file, Please replaceDocker_Image_Namewith the name of your Docker image.docker save -o ./Docker_Image_name.tar Docker_Image_Name:latest
- Enter the port of the project to be deployed in the
Target Project Port.
- Click the
Create Projectbutton.